Butter Chicken

One of my go to Indian dishes when I eat out is Butter Chiken. It’s a classic INdian dish made with marinate and grilled chicken (Tandoori chiccken), simmered in a creamy tomato gravy (curry). The sauce is super silky, buttery, aromatic and mildly spicey. It’s such a beautifully balanced and tasty dish that is a favorite of Indian food lovers all over the world. It’s a dish that layers in flavors. One of the things I learend about Indian cooking is the ginger garlic sauce. You blitz fresh ginger with garlic and olive oil to get a nice paste that is used in so many dishes that many Indians keep a jar of it in the firdge.

The dish begins its flaovor journey with chicken marinating in lemon juice, Kashmiri chili poweder and a lttle salt as its first 20 minute marination, in preparation for the second marination which includes greek yogurt, the gardlic ginger poaste, garu masala, cumin, coriander, kasuri metha (dried cilantro), and tumeric. This marinade should go from 12 to 48 hours.

Next you start with the gravy. First, you let chashews hydrate in water in anticipation of blitzing them in the blender along with tomatoes. Not all butter chicken dishes use onion, but the recipe I used did so. You slice ontions and brown them before adding them to the blender with the finely blitzed cashews and the fresh tomatoes.

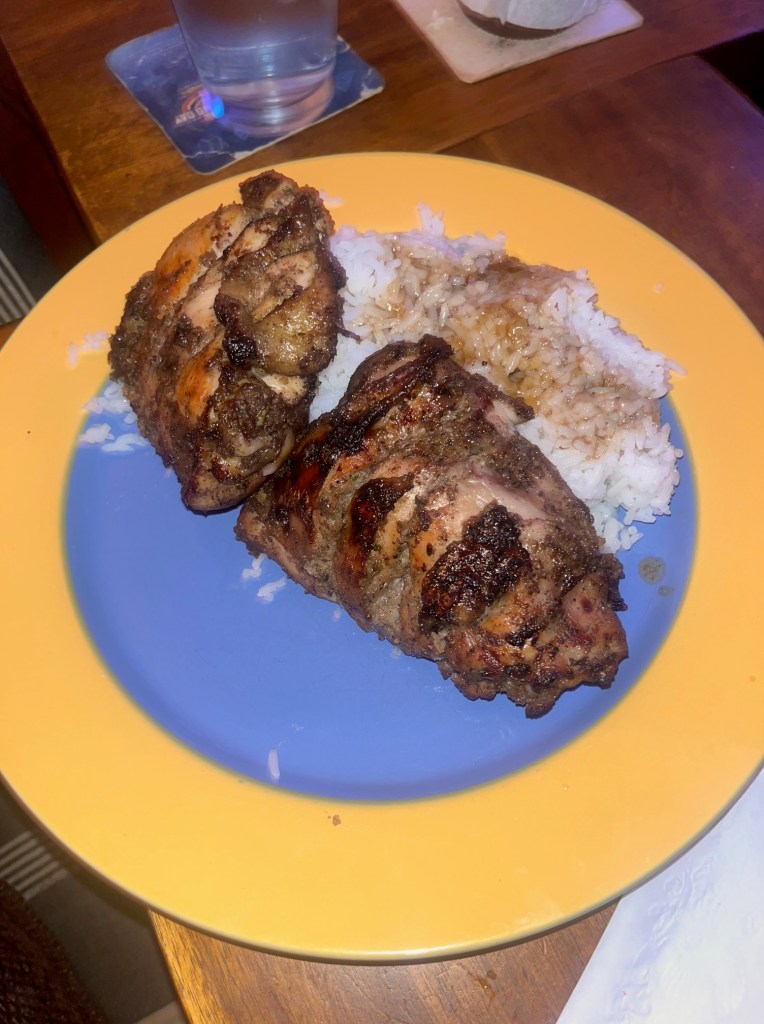
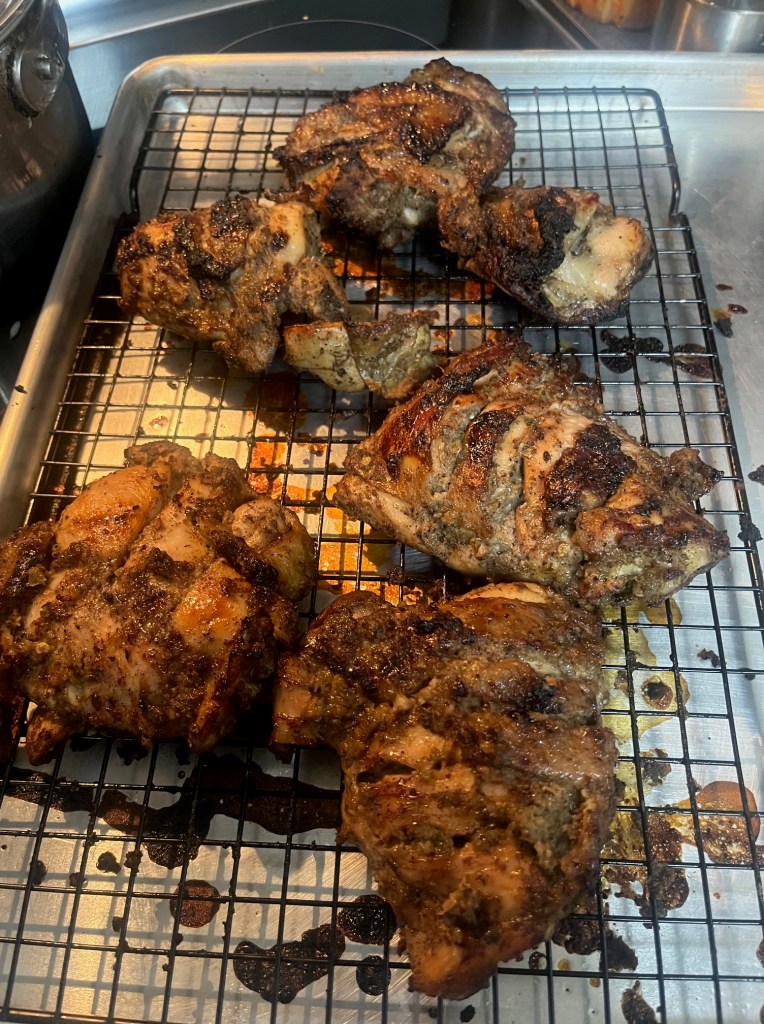
Next, while the sauce is blitzing, I put the chicken onto a sheet pan under the grill to par cook.

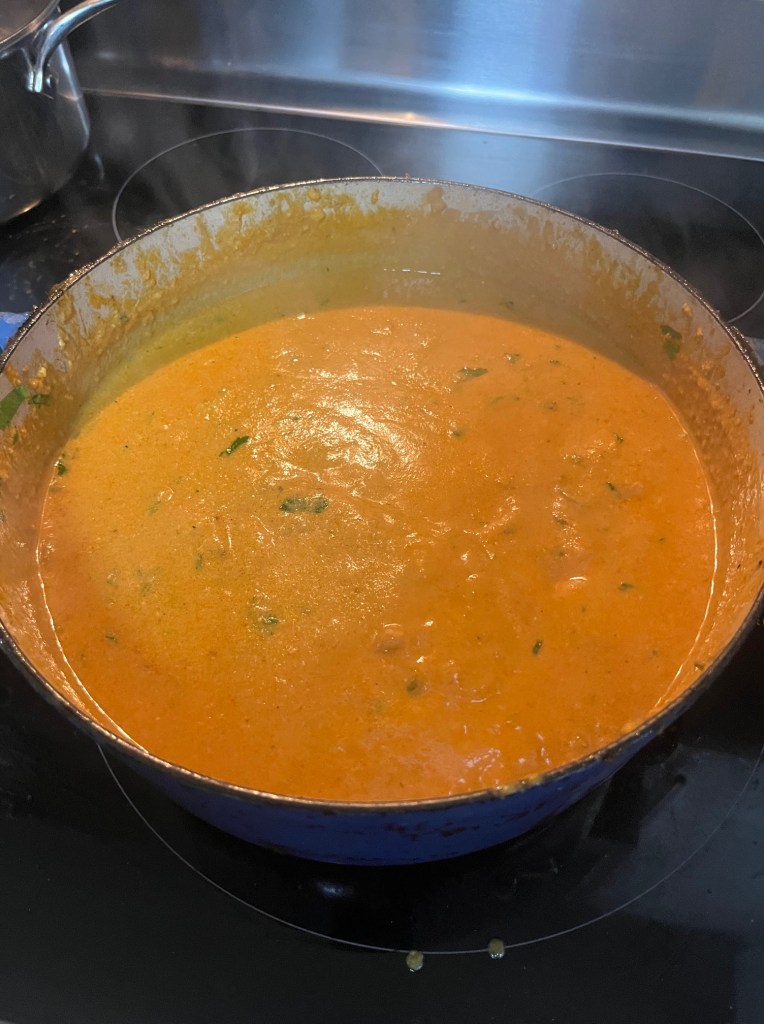
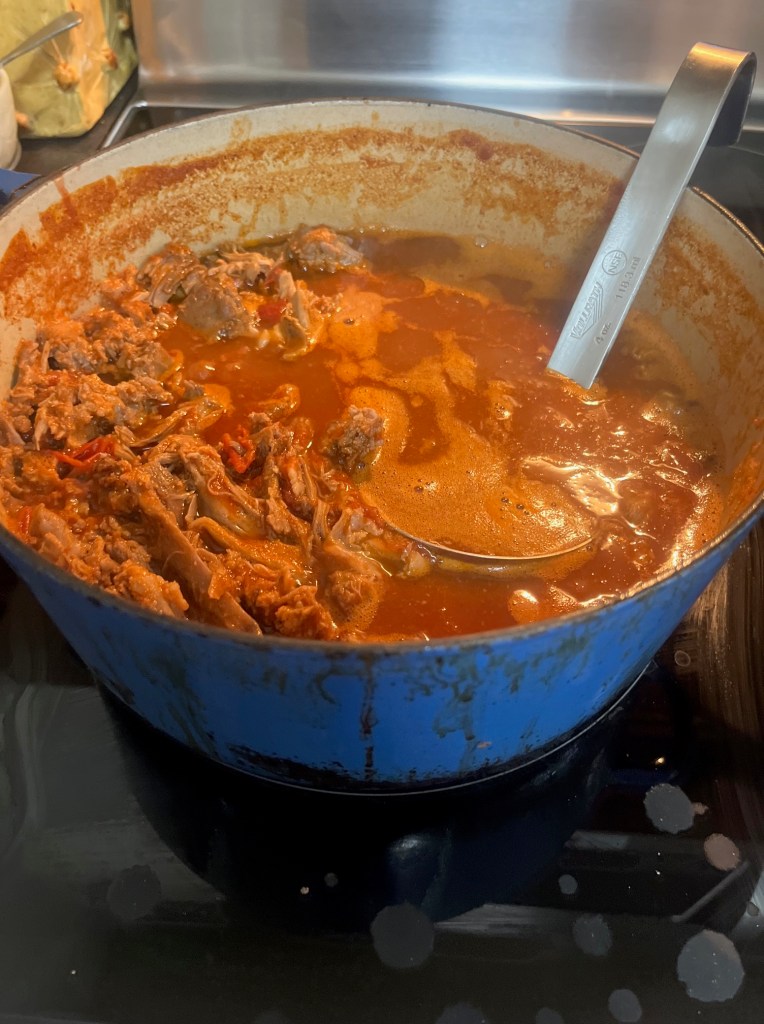
to make the sauce itself you start with the spices. A stick of Cinnamon, cloves and cardemom pods along with the sliced green chilles (I use sorrano). You cook these in butter for a few mintes before adding garum masala, paprika and more chili powder. Next you add the garlic ginger paste and cook it all making sure not to burn it. Then its time to get the blend into the pan, and you can do this through a strainer if its not smooth. enough. Then its time to get this going on medium high heat (avoid the splattering.) You parttially cover it and let it boil for around 10 -15 minutes stirring often till the mix is nice and thick. You add a couple of cups of hot water, and make sure its beginging to come together.

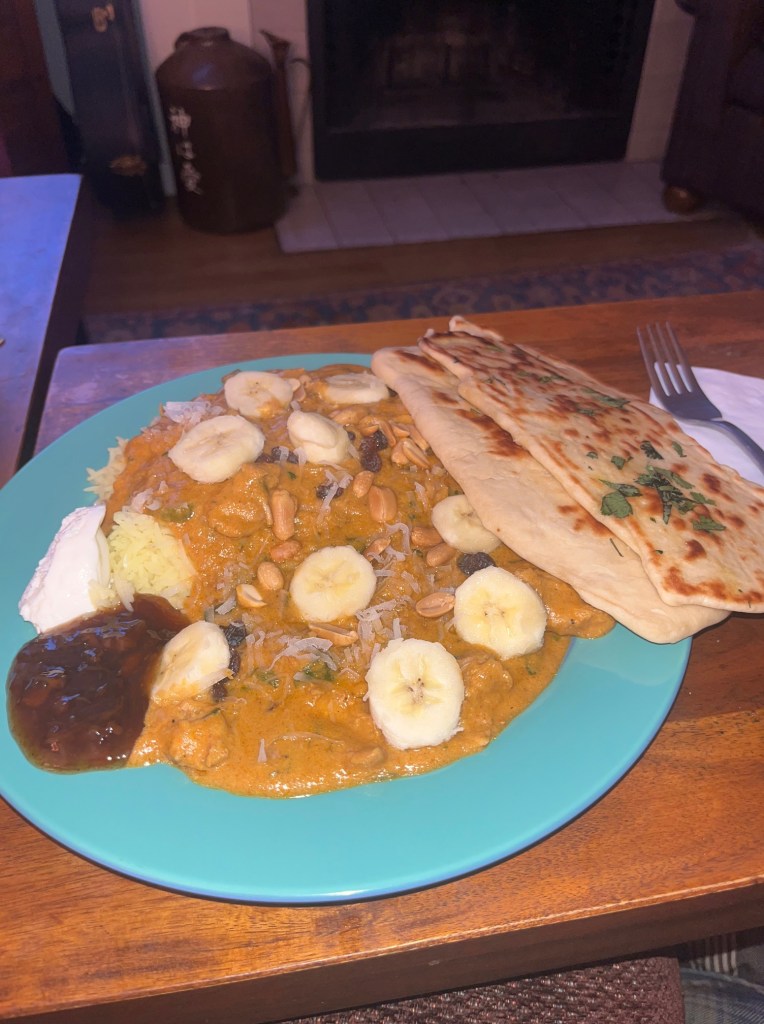
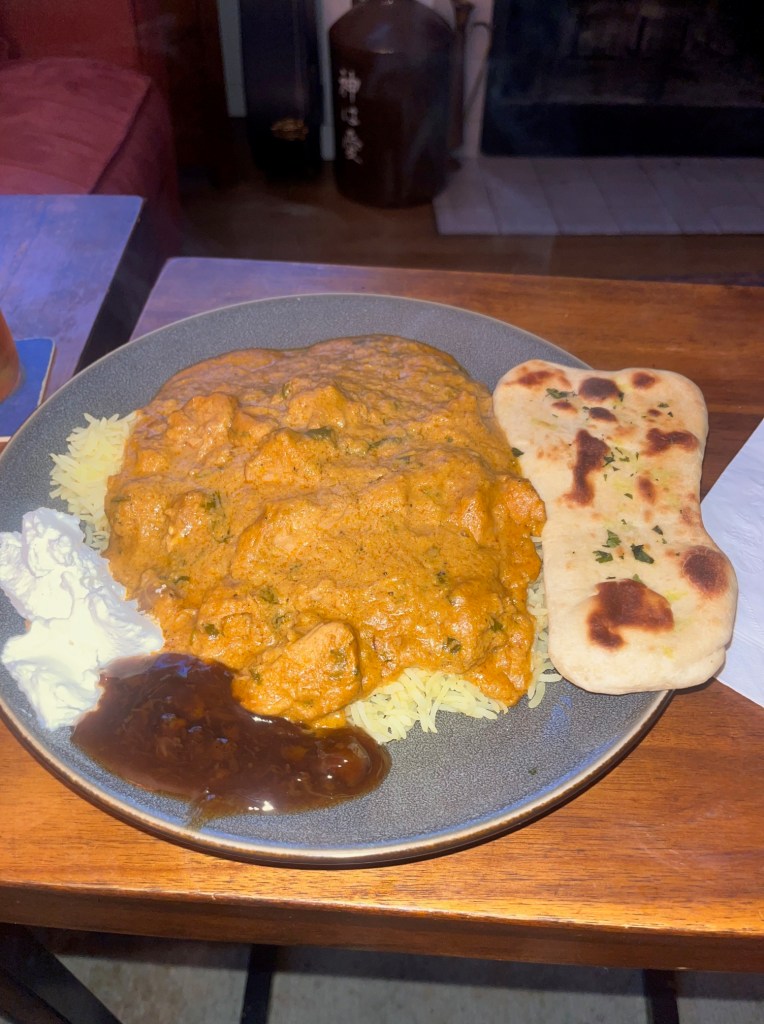
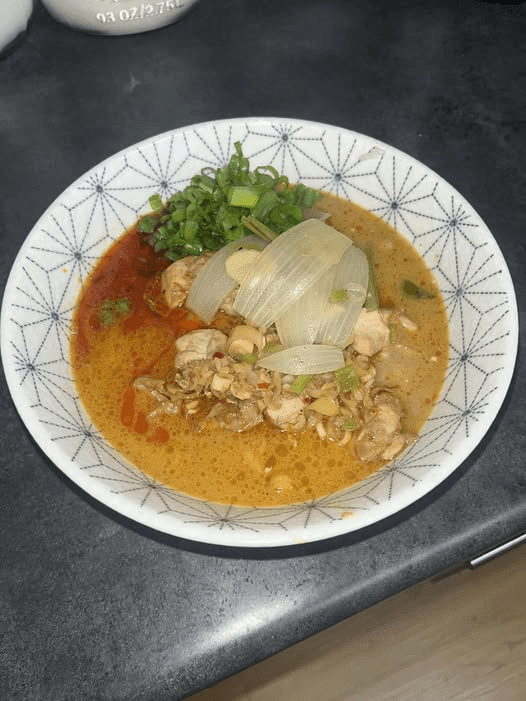
You rpepare to add the chicken from the grill. To finish the chicken in the grill, you want it browned, but not burned. Before you add the chicken, remove the whole psices and discard. Once you add the chicken, you can add a little more more water to get the consistency you desire. Let it cook for another 10 minutes or so. Adjust salt, sugar and add cilantor, and a tablespoon of butter. Take it off the heat, then temper a 1/3rd of a cup of heavy cream and add that to the mixture, and serve it over basmati rice.

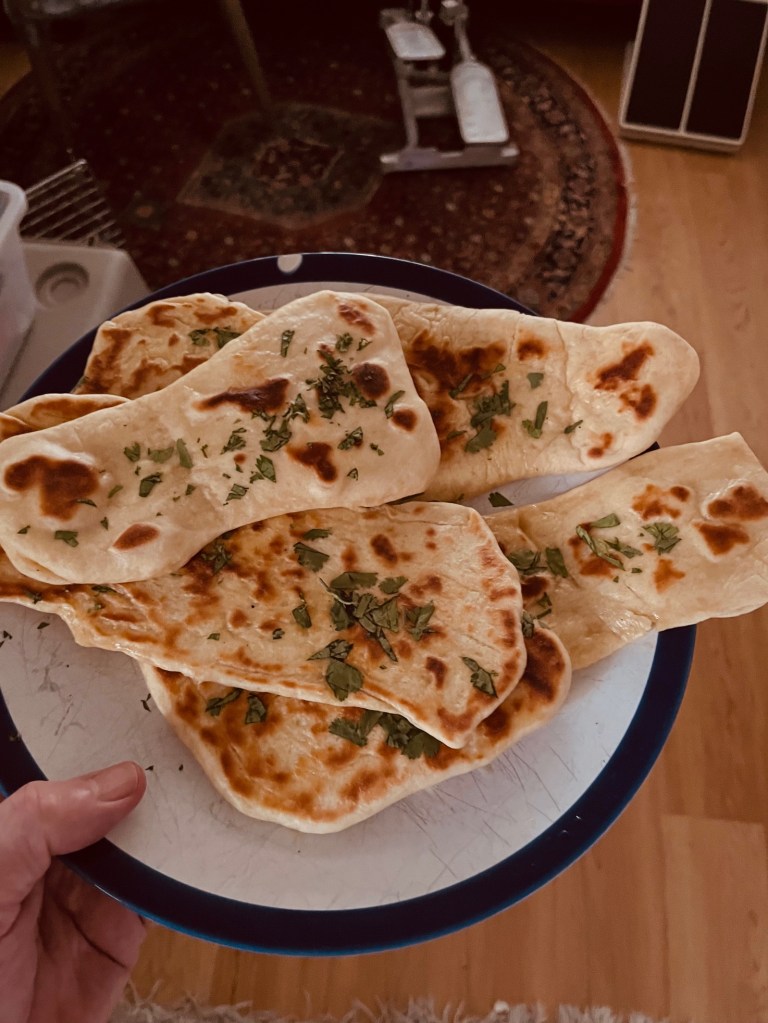
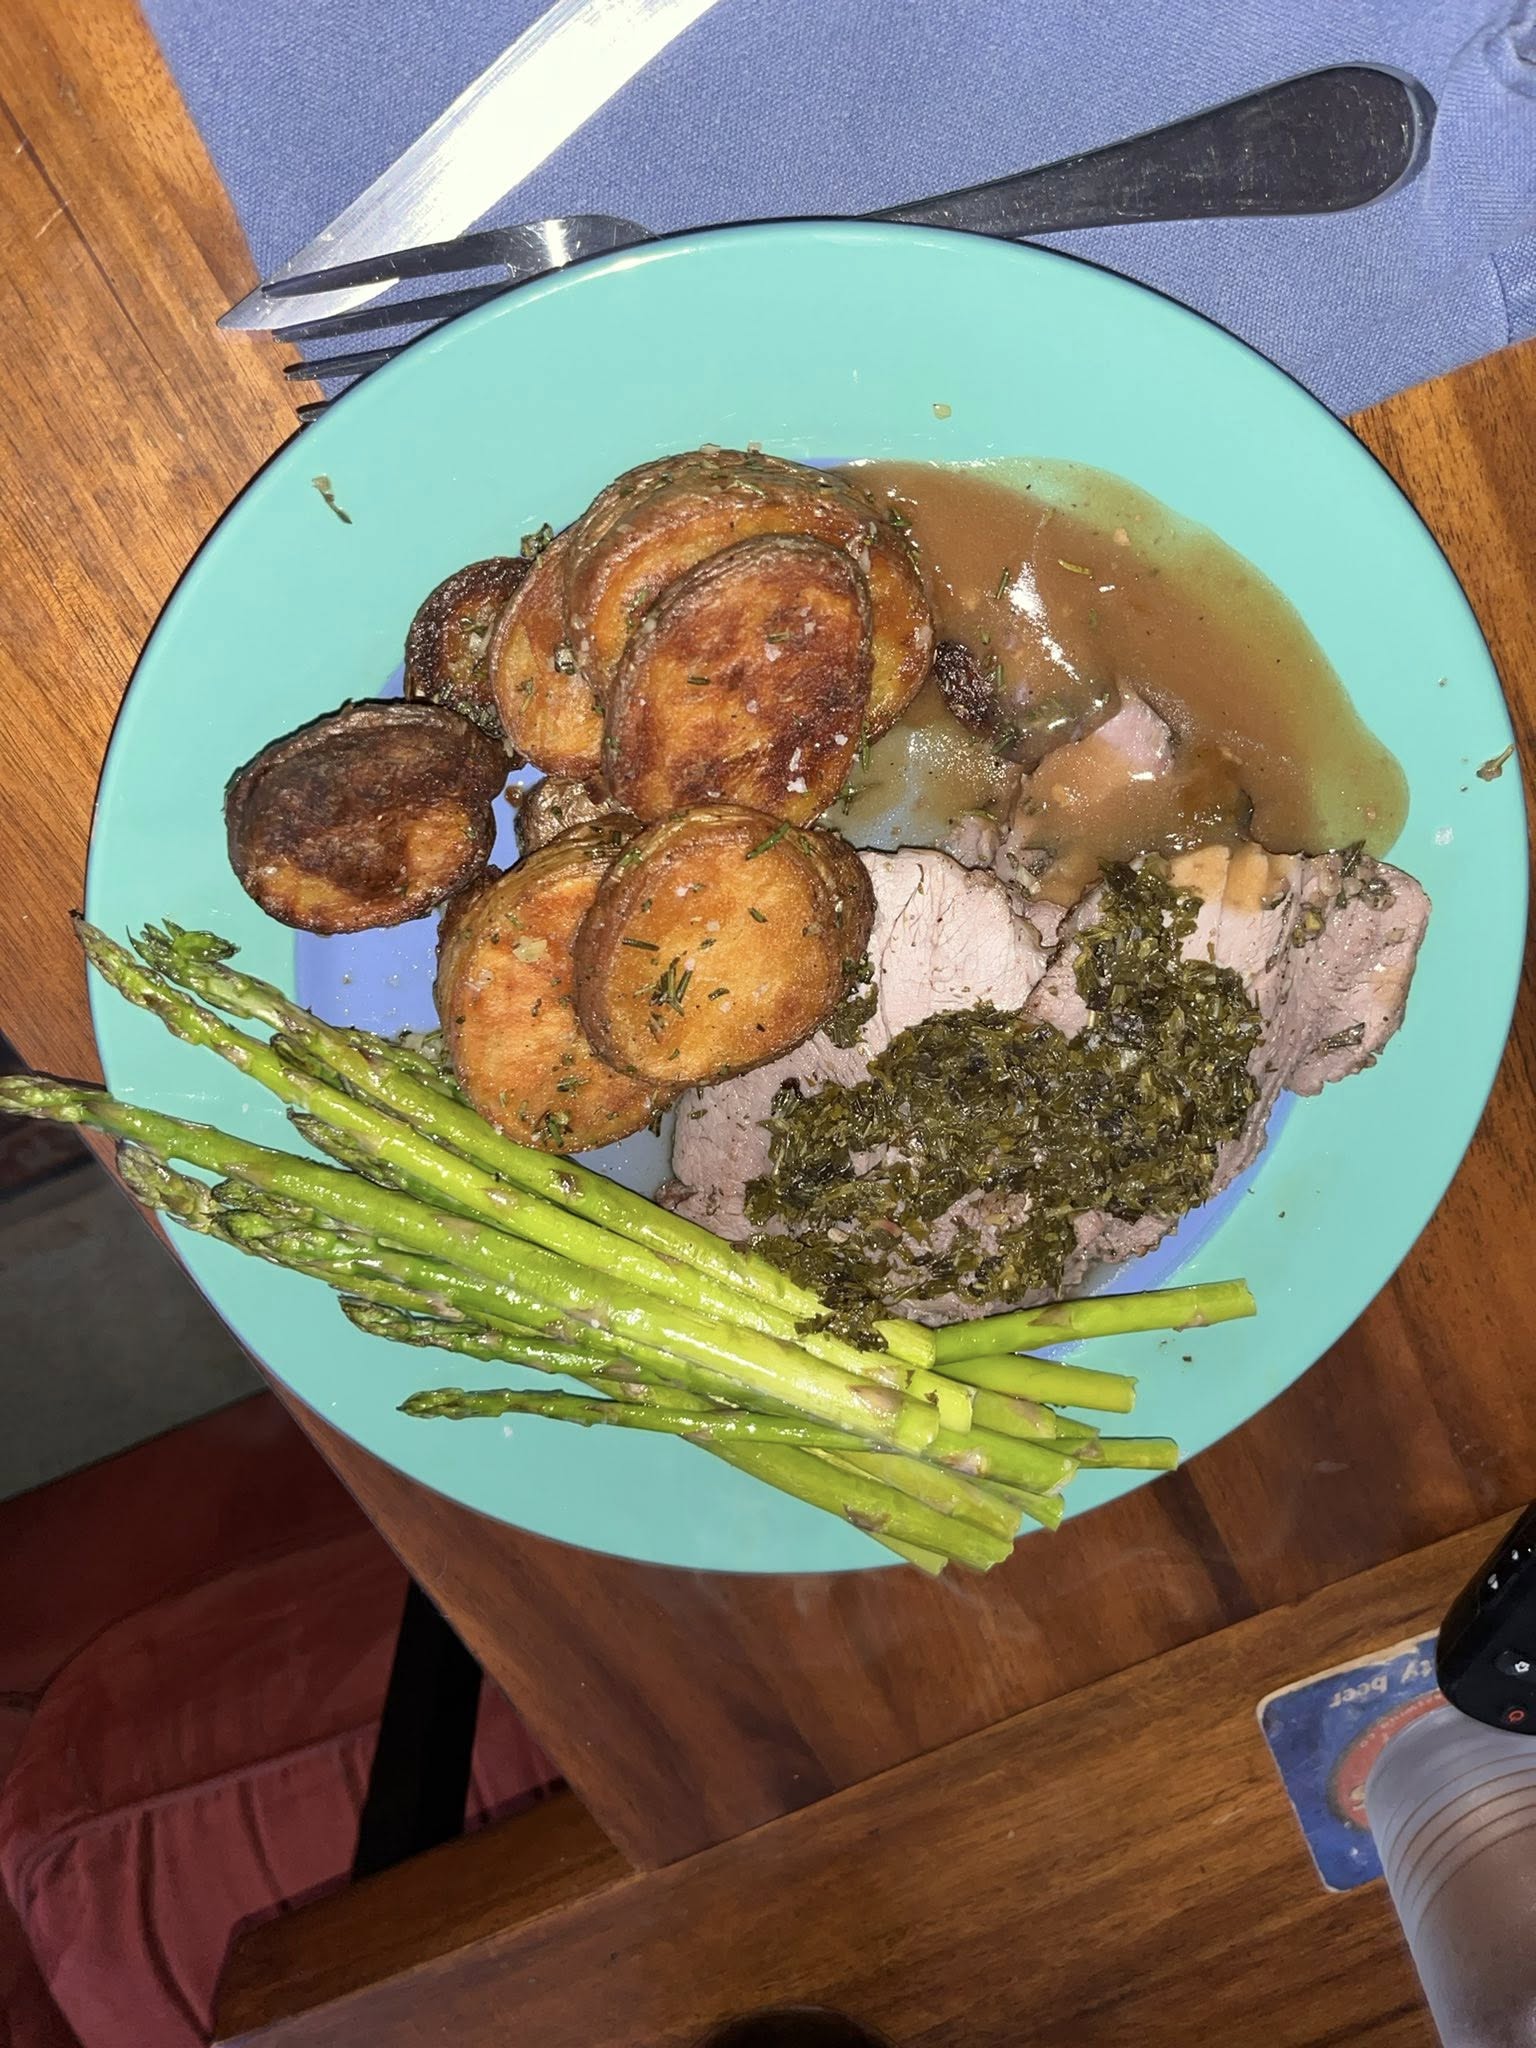
We made our rice with saffron and I also made garlic naan. It is such a great dish. A fair bit of work, but great.

Jamaican Jerk Chicken

This is a great dish. Midway though the meal, Heather said, “This goes into regular rotation for sure!” It’s an interesting way to make a wonderful chicken dish for sure, but, let me warn you, it’s HOT! How hot you ask? The kind of hot where your hair sweats. Your shirt sweats. There is sweat pouring down your face, and even so, you just cannot wait to take another bite!

The secret is in the marinade.

Jerk Marinade

  • 4 scallions
  • 1 small onion
  • 4 cloves garlic
  • 3 Scotch bonnet pepper (We could not find Scotch Bonnet, so we made it with Habanero, which is pretty similar on the Scoville scale.
  • 1 tbsp fresh thyme leaves
  • 1 tbsp ground Allspice
  • 1 tsp black pepper
  • 1 tsp cinnamon
  • ½ tsp nutmeg
  • 1 tbsp brown sugar
  • 1 tbsp soy sauce
  • 2 tbsp lime juice
  • 2 tbsp vegetable oil
  • 1 tsp salt
  • Optional: 1 tbsp dark rum

Blend everything into a thick paste. Slash bone in chicken, we used thighs, and massage the spice into the chicken. The outer limit for the marinade is 3 days, but one day will suffice. To prepare for cooking, I used a 12 inch pan, and carefully wiped the bulk of the marinade off the chicken, leaving a thin layer. I let it rest out of the fridge for about 30 minutes before baking to allow it to come to temperature and tighten up a bit. I baked it for about 40 minutes at 375 before putting the chicken on a grid and painting it with the finishing glaze of hot honey, lime juice and a pi9nch of freshly ground allspice, then caramelized the chicken under the broiler, turning and basting it often for the next few minutes till it began to turn.

I let it rest for about 10 minutes before serving it over rice. I used the time to reduce the sauce that was in the bottom of the roasting pan and poured it over the rice.

Again, an absolutely delicious meal.

Prawns Peri Peri

If anyone asks, my favorite food memory from South Africa is Prawns Peri Peri. I remember as a kid, sitting under the big blue and white tent on the beach in Lorenzo Marques (now Maputo) in Mozambique, eating piles of red hot Tiger Prawns till the tears ran down my face. My mom used to say about me that I only ate 3 things as a kid, Lamb chops, Chinese food, and prawns peri peri.

I had to figure out how to make them as an adult, and luckily was able to find Peri Peri powder from an online South African Store (https://www.africanhut.com/) which has been a great resource for me for a few items. In any event, my recipe is to marinade the cleaned prawns in a marinade of lemon juice, olive oil, loads of finely chopped garlic and a pile of chopped parsley, along with a good amount of peri peri powder (your mileage may vary. Peri Peri is equivalent to the Birds Eye pepper on the Scoville scale. It’s hotter than cayenne, similar to or slightly hotter than Thai bird’s eye chili, and usually not quite as hot as a habanero.)

Then to make it, I always make jasmine rice.

To cook it, ideally, I prefer to cook it over an open flame on the BBQ, but we do not have access to one at our apartment, so I cook them on the stovetop. I use a good size brasier and melt some butter, with olive oil, fresh peri peri powder, and some fresh garlic. When the garlic is softened, I add the prawns, I keep the temperature high and make sure to turn each one over so that they get cooked through, I add any marinade that is left, add a couple hits of angasturabitters, and squeeze a lemon over them to finish. Dish them up over the rice, pour the sauce over the shrimp and go to town. Have ice cold beer available.

These prawns were pretty small, but they were still very tasty!

Pho

Our world tour of soup took us to Vietnam this week, and there is only one soup that can be considered the national dish in Vietnam, that, absolutely, is pho. We live in an area of the world where there are multiple pho restaurants around, which makes it hard to consider making something that is time consuming and labor intensive when for about $20 you can have a perfect soup in about 10 minutes. Something else about pho for me, is that being that I am not from Vietnam, I have no real sense of their ingredients or the way they build flavors beyond eating Vietnamese foods. So, I did what I always do, which is to surf recipies till I find one that is pretty good, well laid out and easily duplicatable. Then it’s down to getting the ingredients. Building pho is a process of layering in flavor. You start with marrow bones and meaty bones (I substituted Ox tail for that part since there were none available.) First you boil the bones for about 5 minutes with the brisket, then you wash them all off and start again. As you are bringing a pot of water to the boil, you scale a couple of onions and gingers, and you roast the spices, including star anise, cardamom, coriander and cinnamon. Then, when the pot comes to the boil, everything goes in, the bones, the meat, the onions and garlic and the spices. That simmers for 3 hours before you pull and save the brisket, and strain the broth into another pot. (I saved the marrow bones because I love marrow on bread!) The broth is flavored with fish sauce, salt, and sugar till its just right.

To serve you have to get the rice sticks (noodles) softened and ready, which we just about got right, and you prepare the sides. In this case, bean sprouts, cilantro, korean peppers, and the thinly sliced meats (including some of the brisket). Then, of course, you need hoisin sauce, siracha and garlic chili to make the dish sing. It’s a truly great soup.

The second day of the meal, which we had a couple days later, was even better. This time, I got the rice sticks )noodles) right. My god, what a delicious dish.

Tagliatelle with Braised Lamb Ragu

I have mentioned that I love the cookbook Frankies Sputino. They have broken down their recopies so that a home chef and literally cook them to the same level of excellence they do in their restaurant. Once we discovered lamb shoulder was available, their Lamb Ragu recipe jumped off the page. What makes this recipe cool is that it is a 2-3 day recipe to make and it creates a fantastic ragu that serves 8. This means that we will have at least 3 additional meals from it. (They tell you where in the recipe to store it before finishing the dish. On day 1, you start out before you even get a chance to roast the lamb, by making a veal stock. To do this you roast veal bones in the oven, then you cover them with water and aromatics before simmering the bones for 4 hours. On day 2, you next, salt and pepper the lamb before roasting it at high temperature for about 45 minutes. While its roasting, you saute carrots, celerty, onion and fennel till they are heavily caramelized. When the lamb is roasted so it is clearly crusted you put it in a braising pot along with the vegetables, fresh tomatoes (crushed by hand) and parsley stems along with the veal stock made the day before.. Then it all sits covered in the braising pot for 2 hours in a 300 degree oven. When it comes out, you strain the stock, discard the vegetables. You set the lamb aside to allow it to cool. The stock is refrigerated and lamb, once cooled is pulled apart with forks, and is also refrigerated.

Day 3 is the day to eat. There are two things to do. One is to make fresh pasta for the tagliatelle needed for the dish. My strategy was to make it a little thicker than fettucine but about 4 x the width. Then you build the sauce with crushed Italian tomatoes.

The Tagliatelle is perfection. Now the sauce is getting friendly with the tomatoes, then the lamb goes in and from there w build the ragu.

Skimming the fat off the stock, and then allowing it to come together with the Italian tomatoes before adding the pulled lamb, gets the dish to the place where you can set some aside for another meal. After that, you build out the final dish with a few ladles of the ragu. To finish the dish, you add butter, Italian parsley, white pepper, salt and ultimately, the tagliatelle

You let the pasta sit in the sauce for a minute before serving and then to serve, you load pasta onto the plate, cover it in the ragu sauce and finish with tarragon and a little olive oil.

It’s not just a beautiful dish. It is spectacular. The way the tagliatelle with it’s soft folds invites the sauce. The depth of flavor that the process creates. The hints of fennel, the brightness of the tarragon, and pure perfection of the bite of the pasta. I loved this dish and will keep in in the rotation!

To be honest, I literally licked my plate clean! I will make one more note. To accompany the dish, I made the tomato, red onion and avocado salad that is literally like putting a gazpacho in your mouth between bites! It too is a winner.

Because it is a fairly significant cook, there will be at least 2 more meals for us to look forward to. This is what was left after the meal for us to save for later.What is great about this is that to get to the finished dish from here is very simple. It gives me a chance to tighten up the sauce a tad too.

As I have said many times now, every single dish I make from Frankie’s Sputino kitchen companion and cooking manual is brilliant. Honestly, the evening was a full culinary symphony — from the pasta to the ragu to the salad and wine, it all flowed together beautifully.

Heather kept saying, “I ma having a moment!” as she dug into her plate.

Lemongrass Chicken with Coconut Soup

There is so much to like about Thai flavors. This soup leverages them all. It’s an easy brothy soup that is two parts, the marinade for the chicken, and then the broth. I marinaded the chicken in bite size pieces, although the recipe does not call for that. You use boneless skinless thighs that you lay on a bed of jasmine rice when you serve. This is a broth heavy soup where the broth does most of the work. It’s so delicious and so moreish and so easy. Definitely one of the contenders for “The best version chicken soup”. It’s pretty easy to make, you just need the right ingredients. The other thing about Thai food is that its HOT and makes your hair sweat! You can ramp up the heat with that Thai chili sauce and add an extra serrano pepper or two. But the sweetness and tanginess of the coconut broth with lemongrass and a touch of lemon juice to finish it is so moreish. I used a little fish sauce and a touch of rice wine vinegar to ramp up the umami. After you marinade the chicken, you sear it in a pan, make sure the sauce caramelizes, then set it aside for serving.

For the chicken marinade:

  • Boneless chicken thighs
  • Crushed pepper
  • Grated garlic
  • Grated ginger
  • Grated lemon grass roots
  • Chilli oil
  • Soy sauce
  • Red chilli sauce
  • Lemon juice
  • Honey
  • Oyster sauce
  • Red chilli flakes
  • Olive oil

For the broth

  • Olive oil
  • Onion petals
  • Thinly sliced ginger,
  • Green chillies
  • Spring onion whites
  • Kafir lime leaves
  • Lemon grass roots, crushed
  • Lemon grass greens, roughly chopped
  • Water
  • Coconut milk
  • Salt
  • Lemon juice

To serve:

  • Jasmine rice
  • Spring onion greens

You put a pile of rice in the bowl, top it with the chicken, if you do not marinade in bite size pieces, then cut into bite size pieces. Top with the broth and the green onions, add chili sauce and a little lime juice, sit back and enjoy!

Roast Leg of Lamb

Growing up, we had a roast leg of lamb as our sunday dinner for as long as I can remember. I have not had it since my mom moved into an old age home 20 years ago. We were shopping at Costco the other day, and they had boneless leg of NZ lamb at a very good price, so we picked up a 5 pound leg.

One of the things that I LOVE with lamb is mint sauce. Heather had never had either leg of lamb, or mint sauce, so she was very excited to make it happen.

First I unrolled the leg, and then I made a rosemary, garlic, salt and olive oil spread that I laid across it all before I rolled it and then tied it using my best version of chef’s knots. (Not good!)

Next I put slits around the meat and placed thin slices of garlic in each slit all around the meat.

That went into the fridge overnight, before being cooked over a deeper pan on a grid over a water bath. I went hot, 450 F for 15 minutes, then about 15 minutes per pound at 350 looking for an internal temperature of 130 degrees.

While the lamb was roasting, I made mint sauce with water, rice wine vinegar, a little salt and sugar to balance it. I use about a cup of finely chopped mint, two table spoons of sugar, about a half cup of vinegar and about a cup of water along with half a teaspoon of salt.

In addition we roasted potatoes with rosemary and garlic, and made roasted asparagus )salt, pepper and olive oil.)

May be an image of ossobuco and mushy peas
May be an image of ossobuco

All in all, it was an amazing meal. Heather LOVED it, esp the mint sauce with the lamb, and for me, it was a real throwback to my youth. I really channeled my mom as I was in the kitchen pulling it together.

My Quirky Diet

Food was an interesting thing for me in those days.

I usually ate millie pap and gravy for breakfast made by the maid. She used sour porridge and made the yummiest savory stew to go along with it. To this day I still prefer a savory breakfast. For lunch I often had a cheese sandwich or a hot dog sandwich or my favorite toasted cheese and tomato. Yum! I still make toasted cheese and tomato at every opportunity, and I have been working on a refined version of millie pap and gravy.

We also had a puffed wheat cereal that I ate dry by the handful. I hav enot been able to find anything like it in America.

My mom used to say that I “only ate three things”. Lamb chops, grilled prawns and Chinese food. Which was defintely true.

Sunday nights we usually had chops and chips (lamb chops and French fries) – I loved those meals, still do.

We had a formal dining room and ate dinner as a family served by Abbiott, the Gardner by day, white-coated waiter by night. My mom had a little bell and would ring for the servants to bring the next course or take away dirty dishes. We literally ate 3 course meals every day. Nobody was allowed to leave the table till everyone was done and I always struggled to finish what my mom dished up for me. I Remember people sitting staring – glaring at me really – saying “eat Neil” over and over while I ignored them. I sometimes would get my cold dinner from the night before, for breakfast the next day. It wasn’t always like that. We all used to fight over the bone marrow in the soup, the roasted potatoes, and the bread-and-blood drippings when Meat was carved. I still have a serious craving for those tidbits.

What is so odd about that, is that today I have a very expanded and developed palate. I eat pretty much everything, and my self-expression is that I LOVE to play in the kitchen!

For example:

The Agog Pizza

In the Seattle area, there is a pizza place called Pagliacci, and they are among our favorite pizza locations. They make interesting pizza’s and have a wonderful crust. Among the best of their pizza’s from our perspective is the Agog Pizza. This is a garlic infused olive oil base pie with roasted garlic, mushrooms, kalamata olives, Goat cheese, Fontina cheese, mozzarella cheese, parsley and fresh tomatoes. It’s consistently a great bite of food. The brininess of the olives, the funk of the goat cheese, the umami of the garlic, the chew of the mushrooms, the acidity and freshness of the tomatoes and parley, this pizza has it all. Except sauce!

Ingredients:

  • Garlic infused olive oil
  • Roasted garlic
  • Sliced mushrooms
  • Kalamata olives
  • Goat cheese
  • Fontina cheese
  • Mozzarella cheese
  • Chopped parsley
  • Chopped fresh Roma tomato

This was our first bake with the new dough, I was still learning how to use the pizza stone and gauge the new oven temperatures, so this pie was a little under. The flavors were there, but we have to try it again with a proper bake.

We chose to revisit the Agog, making sure this time, to get the bake right. It is a really great pizza! Unfortunately, we were out of fresh tomato when we took another stab at it.

Round 3. This time we got it exactly right!

Dutch Baby

the Dutch Baby is one of my go to Sunday breakfast treats. I have spent years perfecting it! LOL It’s so easy to make that even a novice can turn out a world class Dutch Baby.

Ingredients:

  • 3 eggs
  • Half a cup of milk (I use 2%)
  • Half a cup of all purpose flour
  • 1 Tbs of sugar
  • A generous pinch of ground nutmeg

The way I make it is that I drop the ingredients into a mixing bowl, then using a hand mixer, make sure its all mixed in. Let it rest, in total for about a half hour, while the oven, which you are pre-heating to 425 degrees is getting hot. Make sure to put a clean large frying pan in the oven so it gets hot as the oven gains temperature. Apparently, resting the custard allows the glutens to bind. Anyway, when the oven comes to temperature, add a half stick of butter to the frying pan.

While the butter is melting (which does not take long at that temperature), give the custard another mix with the hand blender, then (using a serious oven mitt) put the frying pain on top of the stove and pour all the custard into the pan, then, again, using a serious oven mitt, put it back in, close the door, and wait a minute till the oven heats up again after having the door open.

What I do next is change the temperature to 400 degrees and once it hits 400 degrees, I set the timer for 20 minutes.

Now here is where you need to know your oven, we just got a new oven, and it’s way more efficient than the last one, so I check it at 17 minutes. This one came out at 18 minutes.

The way we eat this is that we split it down the middle, and today, Heather made a lovely, tangy, tasty berry compote to go with it.

Enjoy!