Russian Black Bread Borodinsky Style

Growing up, Russian Black Bread was something that my mom served. I gerw up enjoying eastern Euorpean fare and black bread with borscht, for example, was sometimes on the menu. It’s funny, but its been in the back of my mind to make a russiand black bread since I started making bread regularly. The recipe is very different from regular bread making. It’s a no kneed bread with a very wet flour. Russian black bread is deep, slightly sour, mildly sweet, and intensely rye-flavored. The classic version is Borodinsky bread, made mostly with rye flour, molasses, and coriander seeds. Since I’ve been working with sourdough,I chose to make a naturally fermented version, which is closest to the real thing.

Ingredients

Rye Sour Build (8–12 hrs before)

  • 50 g sourdough starter
  • 100 g dark rye flour
  • 100 g warm water

Mix and let ferment overnight.


Dough

  • All of the rye sour
  • 300 g dark rye flour
  • 50 g bread flour (optional but helps structure)
  • 280 g warm water
  • 2 tbsp molasses
  • 1 tbsp honey
  • 1 tbsp cocoa powder (traditional for color, not chocolate flavor)
  • 1 tsp salt
  • 1 tbsp ground coriander
  • 1 tbsp whole coriander seeds (for topping)
  • 1 tsp instant yeast (optional but traditional for lift)

Instructions

1. Mix

Combine everything except the topping seeds.

Important:
Rye dough will feel more like thick batter than wheat dough. That’s normal.

No kneading required.
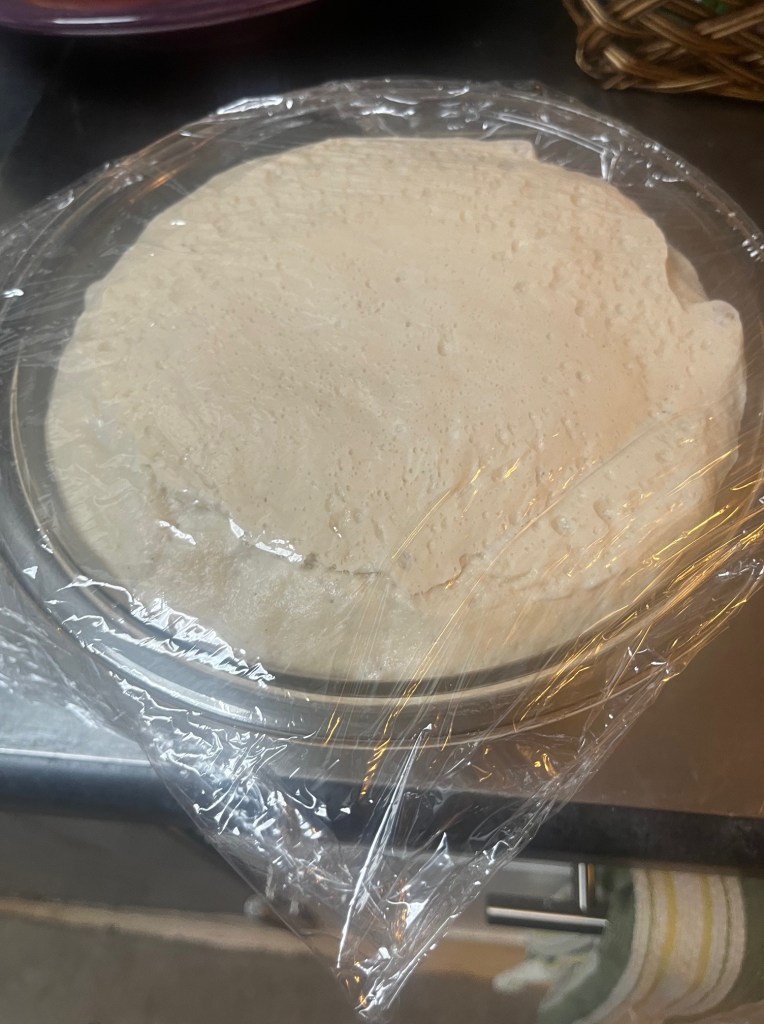

2. First Rise

Cover and ferment:

  • 2–3 hours at ~75°F

It will rise some but not double.
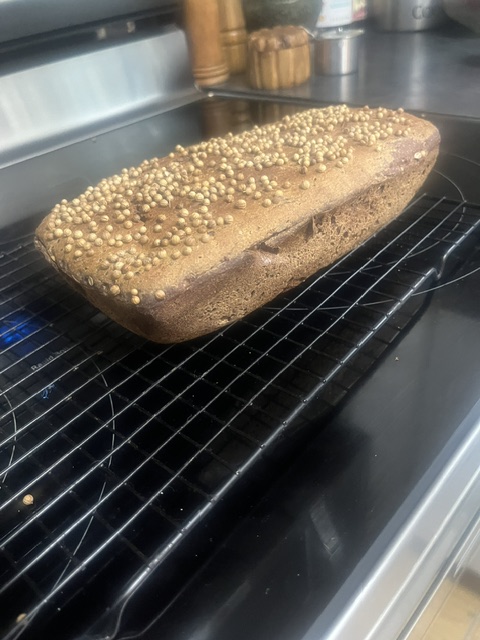

3. Pan It

This bread must be baked in a loaf pan.

  • Grease a pan
  • Scrape dough in
  • Smooth top with wet spatula
  • Sprinkle whole coriander seeds

4. Final Proof

Let rise until slightly puffy:

45–60 minutes


5. Bake

Bake at:

375°F / 190°C

For 45–55 minutes

Internal temp should reach about 205°F.


6. The Hard Part: Wait 😄

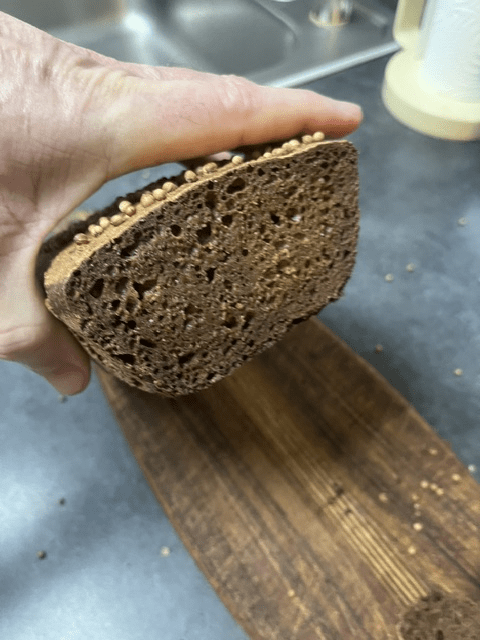
Wrap the bread in a towel and let it rest 12–24 hours before slicing.

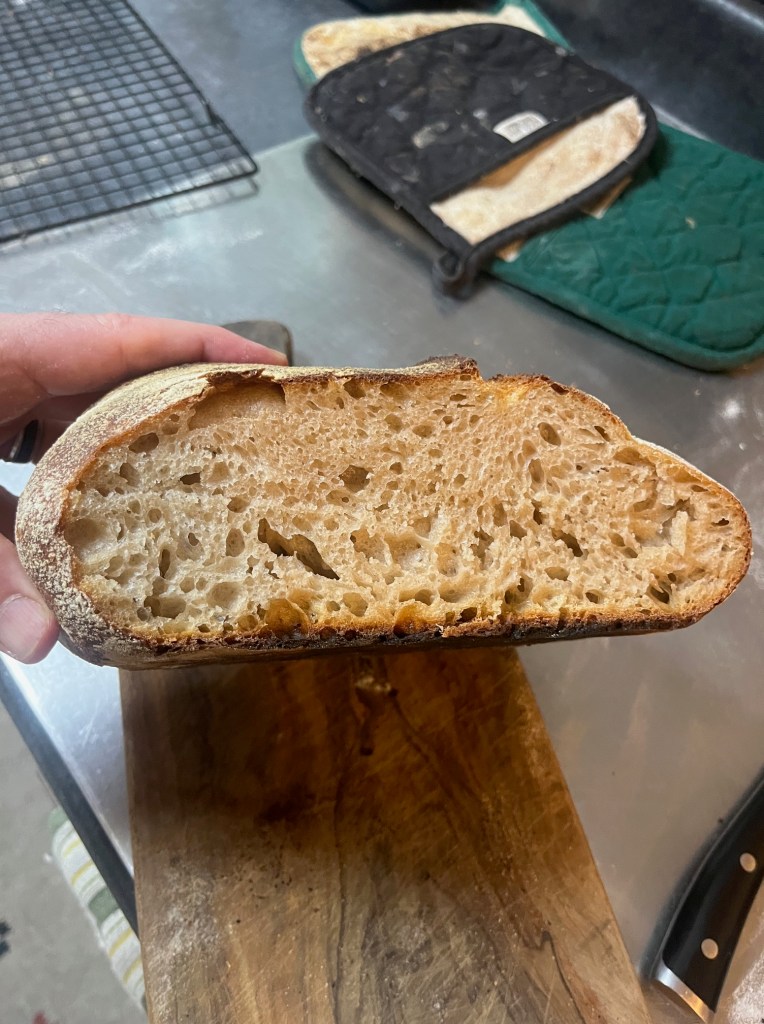
This allows the crumb to set properly, otherwise it can be gummy.

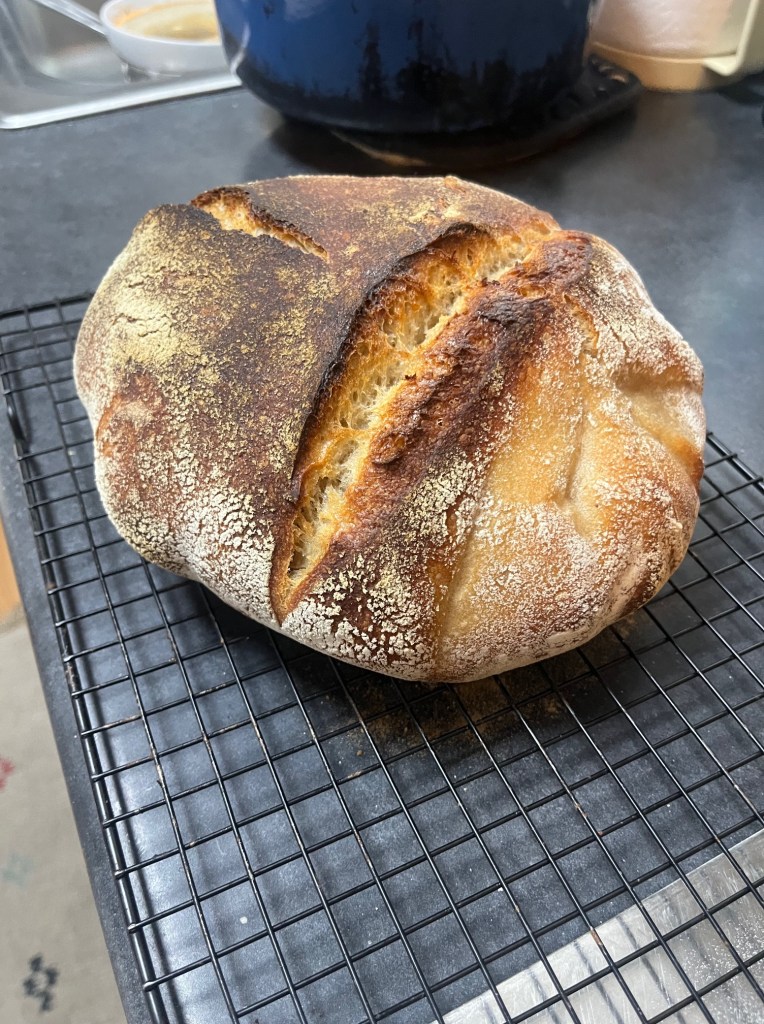
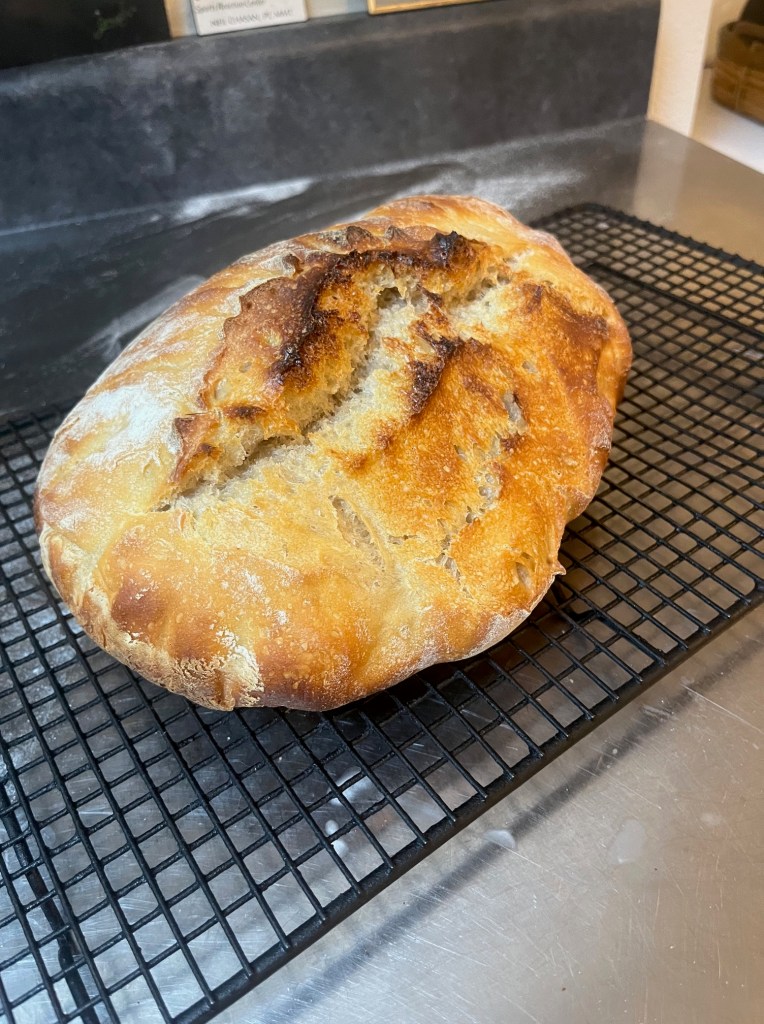
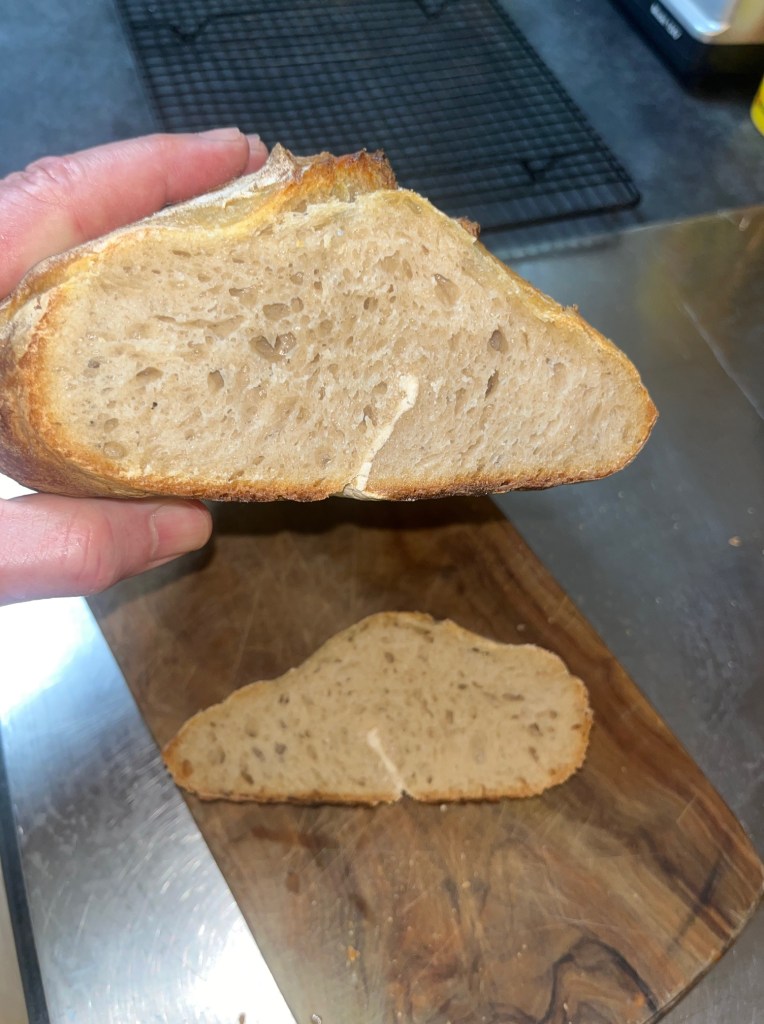
It turned out perfectly. It was deliciously sour and has that beautiful fragrance of teh coriander and lovely rye flavor. Heather when tasting it said, “THAT is Russian Black Bread.”

Samosa

When I was a kid, I loved when we had samousas. Since we have all these Indian stores in our neighborhood, we have access to any ingredient needed in that realm. One day, I went to the local grocery store and in their delly they had samousas, so I tried one. It wasn’t bad at all, but it was not quite the taste I was used to. So, I set about making samousas!

I started with making a ground beef stuffing with peas, garlic, ginger and onion. The spice I mainly used was garum masala and some red chili powder along with cumin and cardemom. I also used cumin seeds along with cilantro, lemon juice and jalapeno peppers. After I cooked that up, I put it in the fridge to cool, then set about learning how to make the dough to make Samousa.

It’s an enriched dough made with peanut oil and the secret ingredient are the Ajwin seeds.

  • 2 cups all-purpose flour
  • ½ tsp salt 1–2 tbsp oil (or melted ghee) ~
  • ¾ cup water (as needed)
  • Extra flour for dusting
  • 1/4 tea spoon of Ajwain seeds.

The secret to this dough is to get it together, let it rest a while then divide it into seperate balls, (I used 50 g), keep them coivered, then roll each one out as thin as possible, around a 1mm thickness. Once rolled, it gets dropped on the hot plate for 15 sec a side then layed out under a cuver to keep it moist.

Once rolled out and cooked briefly on each side, you use the pizza cutter to cut rectangles. Then, make a four paste for glueing the sides before folding. To fold, make a pocket. Fill without over filling, seal the pocket and set aside, covered.WHen all the samousa are made, they go in the freezer till its time to fry.

Nest is the oil. I used peanut oil and tried the first batch in the wok, which got too hot. They tasted great, but I needed to get better control of the heat. So, I went to a sauce pan with a candy thermometer, and did these at 350.

They really need to be at 300 first then finished at 350

These are MUCH better, also delicious, but I still do not have the blistering I am looking for. Next time!

Here are the potato and peas with chicken vindaloo version

Sourdough Loaf

In order to make a loaf of sourdough, the first thing I did, was create a fresh batch of starter by feeding a little starter with fresh flour and water and setting it in the proofer. It took about 6 hours to bloom. Then, I mixed the bread flour and All Purpose flour with water and set that in the proofer to allow the flour to absorb all the water. Then I added the starter and the salt and mixed it by hand till it was absorbed before proofing it and stretching it every 30 minutes before allowing it to proof uninterrupted. After that, I put it in the fridge in a flour covered kitchen towel in a bowl after shaping it into a round loaf. It rested in the fridge for about 12 hours.

In the morning, I put the Dutch Oven into the oven uncovered and turned the heat up to 525 and left it there for about 2 hours so it would be very hot when I put the loaf in. When the time came to put the loaf in, I took it out of the fridge and flipped it out onto a piece of parchment paper that I had cut in anticipation. I scored the loaf when looked perfect, and immediately took hold of the parchment and dropped it into the steaming hot dutch oven and covered it immediately, the into the oven it went with the temp at 500. After 20 minutes, I took the cover off and left it to bake. at 20 minutes I checked the color and the temperature (internal temp of 112 degrees) and decided to take it out. Onto the wire rack it went for an hour of cooling.

When it cooled, I cut a slice to taste it and check the crumb. During the proofing process, I made several folds to see if I could trap air in the dough, and low and behold, it looks perfect, and tastes like a perfect sourdough loaf! The crumb is open and its close to perfect! Just a few little refinements next bake to include a shorter proofing, slightly shorter in the fridge too, and to be comically gentle when I shape the next loaf!

Round 2.

  • Slightly longer proof in the fridge (24 hours)
  • Slightly lower temp to bake (485 20 min lid on, 25 min lid off)
  • Pizza stone under the Dutch Oven to miminize charring on the bottom

My assessment of the second loaf is that I got the sour right. In order to get it right, I cold proofed for 24 hours. I slightly undercooked it. It needs 5 more minutes. I know this because toasted, it is perfection.

Making Sourdough Pizza Dough

For a while now, I have wanted to create a sourdough starter. I have tried in the past to do this, but never really had a good enough temperature situation to do so. The Pacific NW is too temperate. Too hot in the summer and not hot enough the rest of the year, as well as being too humid ongoingly. Anyway, that was my excuse as to WHY I could not successfully get a sourdough starter going.

We got ourselves a proofer. It was a gift from Heather’s mom a couple of years ago, and for a long time, mainly because we I was out of the habit of attempting to make bread, it sat up high on top of the kitchen cupboards. Then we started making pizza dough, which had us pull it down and set up a place where it could live so it was accessible. That had us thinking about sourdough starter once again. This time I went for it.

A sourdough starter is a living culture made from just flour and water. Over time, it becomes home to

  • Wild yeasts (which make dough rise)
  • Lactic acid bacteria (which create sour flavor and help preserve the bread)

These microorganisms are already present on the grain, especially in the lovely wild stone ground flour we are using. Its also present in the air, and on our hands and kitchen tools. So, I began using a 50/50 mixture of water and flour and over about 10 days, I discarded most of it and fed it with another 50/50 blend. I did that religiously until it settled down and smelled lovely and sour rather than like acetone. At that point I put it in the fridge, sealed. Armed with a sourdough starter, that we call Guinnivere, we now have a new friend in our kitchen that needs love and attention.

When I make pizza dough, I use a specific recipe:

  • 150g of pizza flour
  • 9 g of salt
  • 270 g of water (at 65 degrees)
  • 1 packet of yeast
  • Then once its combined, I mix it at medium speed for about 7 minutes.
  • After that, I let it rise for about 5 hours in the proofer before I separate it and let it rise in the fridge for two or three days.

What makes working with sourdough starter is that it all takes a little bit longer. First of all, the quantities are quite different. There has to be an adjustment on both the amount of dough as well as the amount of water. This is what I do;

  • 365 g flour
  • 225 g water (instead of 220 g)
  • 100 g starter
  • 9 g salt

Then, I put it, covered, in the proofer, but instead of 5 hours, it lives there overnight. By that time, it rises quite a lot, which is good. It keeps yeast active, it speeds bacterial activity just enough, which it allows the gluten to develop before the cold (of the second rise) tightens it. Once it rises and I have divided it for the second rise, I cover it with olive oil so it does not dry out, I let it rise in the fridge for 30 minutes uncovered before covering it.

As it chills in the fridge, the fermentation slows, the structure set and the handling improves dramatically.

Divided, each piece makes a 14 inch pizza that tastes brilliant!

This is the look right before it goes in the fridge.

I normally cover the dough with olive oil so it doesn’t dry out, then put it in the fridge uncovered for 30 minutes before covering them. I try to make them 2 or 3 days before we need them so they can continue to ferment.