The Agog Pizza

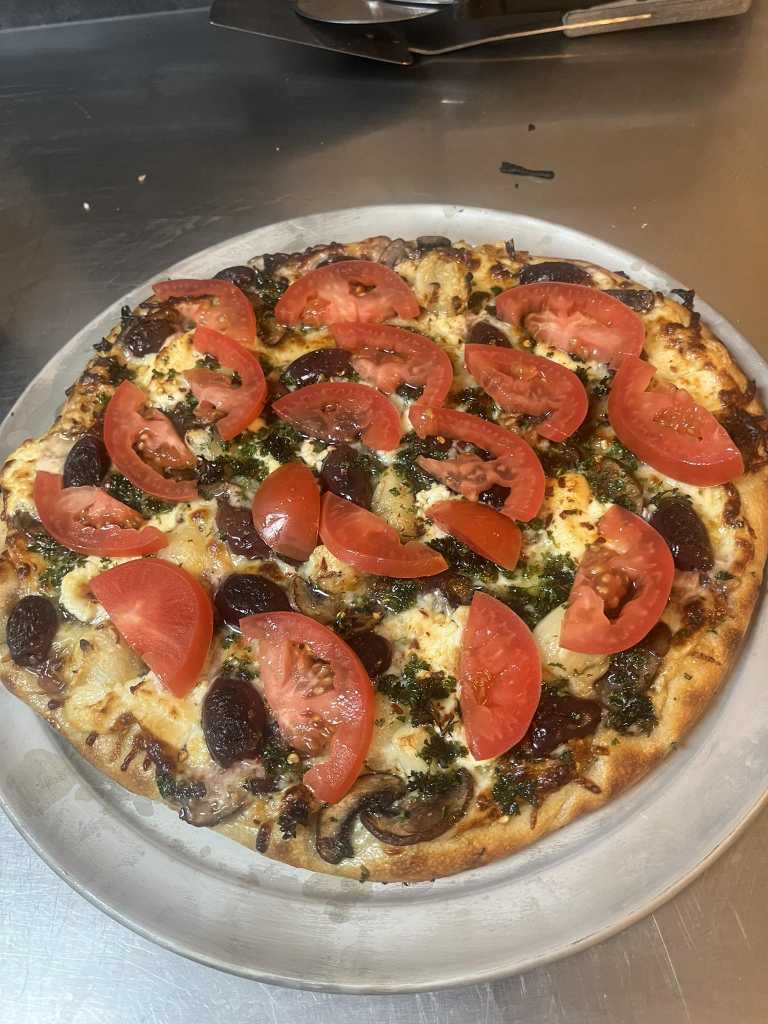
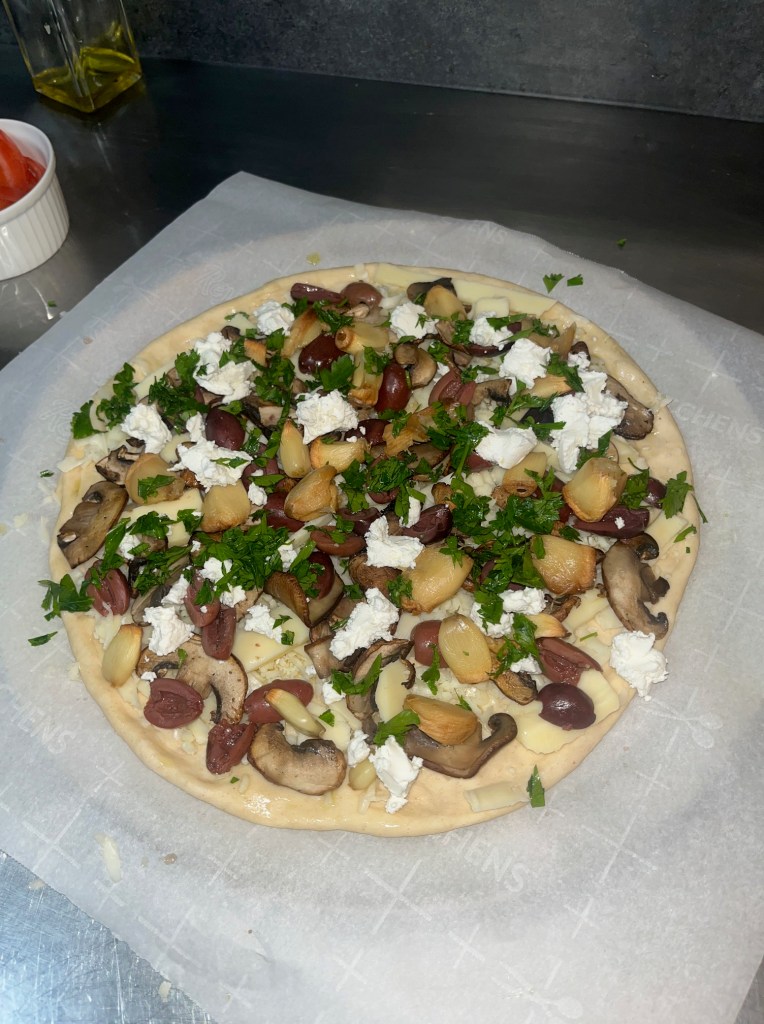
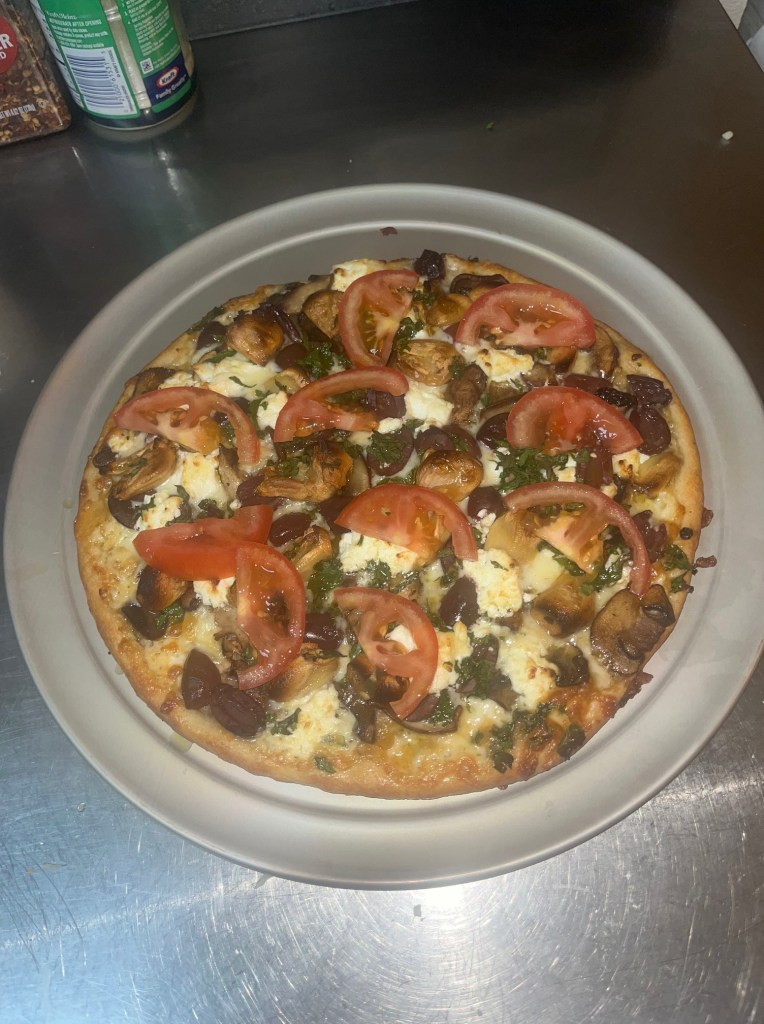
In the Seattle area, there is a pizza place called Pagliacci, and they are among our favorite pizza locations. They make interesting pizza’s and have a wonderful crust. Among the best of their pizza’s from our perspective is the Agog Pizza. This is a garlic infused olive oil base pie with roasted garlic, mushrooms, kalamata olives, Goat cheese, Fontina cheese, mozzarella cheese, parsley and fresh tomatoes. It’s consistently a great bite of food. The brininess of the olives, the funk of the goat cheese, the umami of the garlic, the chew of the mushrooms, the acidity and freshness of the tomatoes and parley, this pizza has it all. Except sauce!

Ingredients:

  • Garlic infused olive oil
  • Roasted garlic
  • Sliced mushrooms
  • Kalamata olives
  • Goat cheese
  • Fontina cheese
  • Mozzarella cheese
  • Chopped parsley
  • Chopped fresh Roma tomato

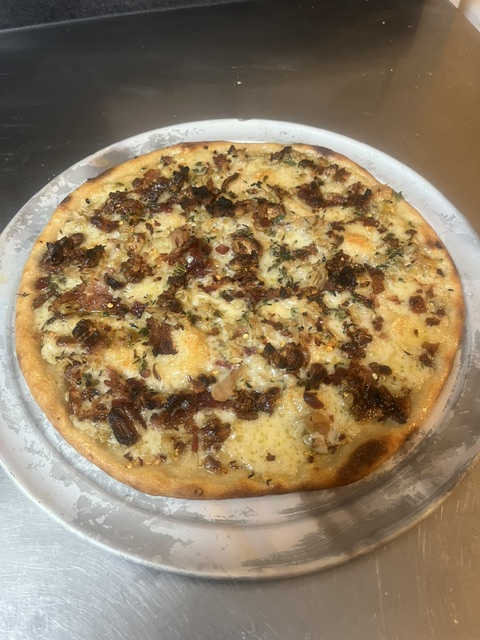
This was our first bake with the new dough, I was still learning how to use the pizza stone and gauge the new oven temperatures, so this pie was a little under. The flavors were there, but we have to try it again with a proper bake.

We chose to revisit the Agog, making sure this time, to get the bake right. It is a really great pizza! Unfortunately, we were out of fresh tomato when we took another stab at it.

Round 3. This time we got it exactly right!
The Classic Margherita.

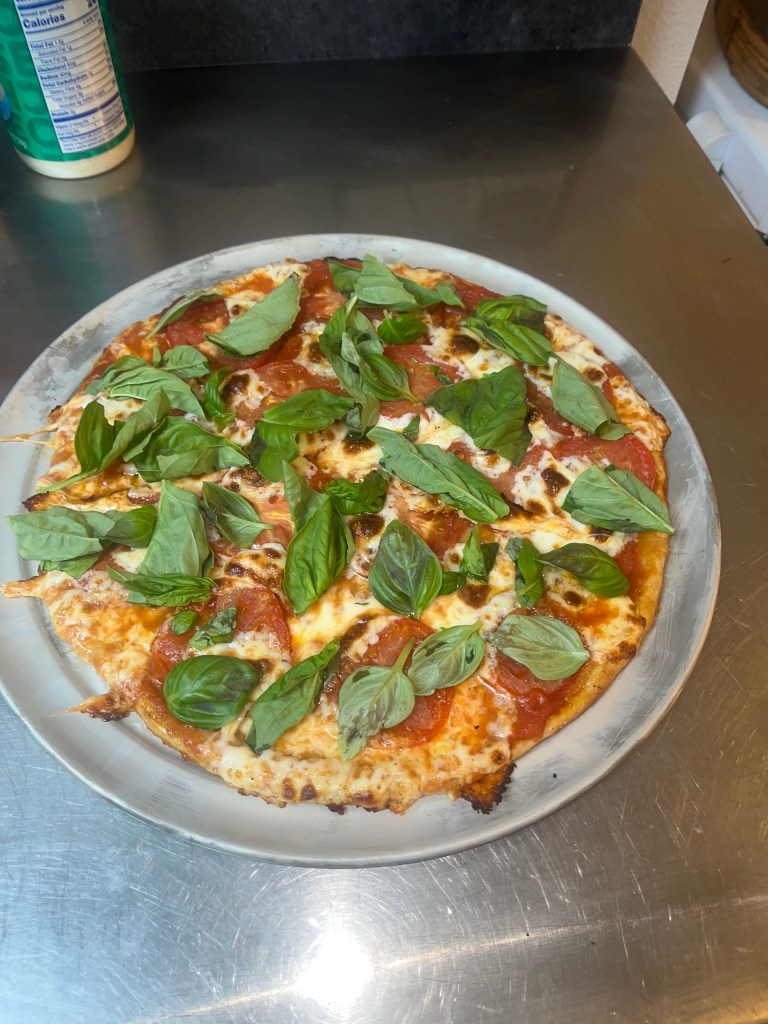
One of my very favorite pizza’s is the Classic Margherita. According to legend, it was invented by Chef Raffaele Esposito of Pizzeria Brandi in Naples in 1889 for the Queen of Savoy. It is such a great pizza that it has stood the test of time. Made simply with tomato, mozzarella and basil, it’s always a magical flavor profile.

Ingredients:

  • Fresh Mozzarella
  • Fresh ripe Roma Tomatoes
  • Fresh ripe Basil

I lost track of time and this one was, lets say, a little crisp! Next time we make it I will replace the image.

This one was PERFECTION!

Rosa Pizza

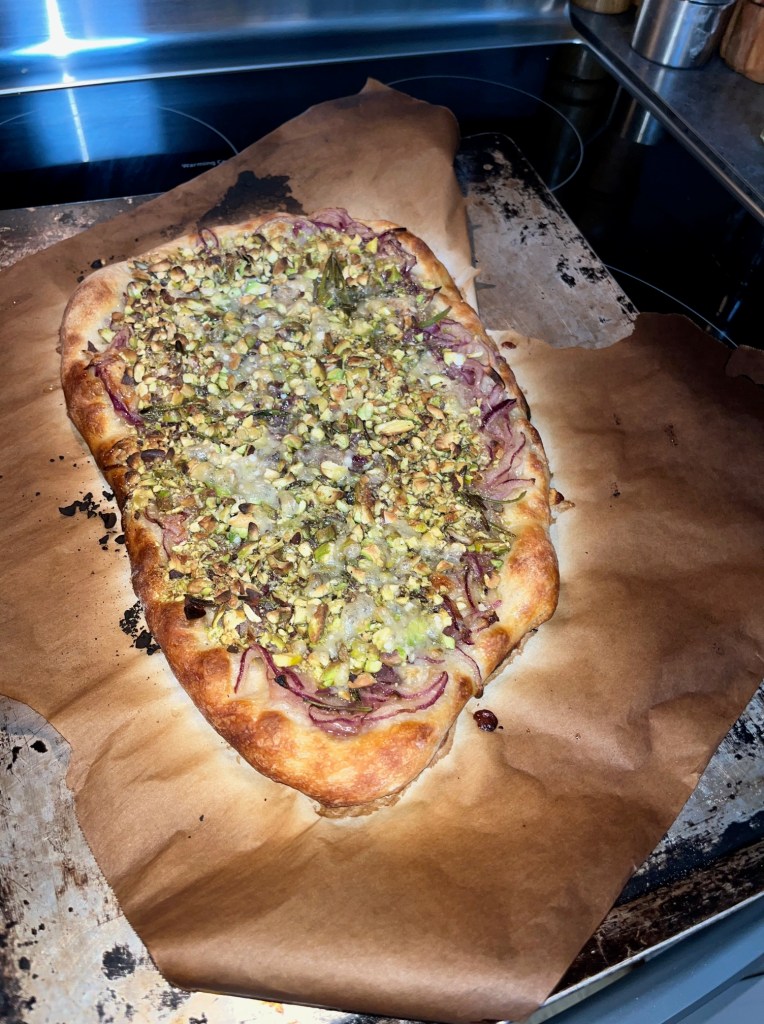
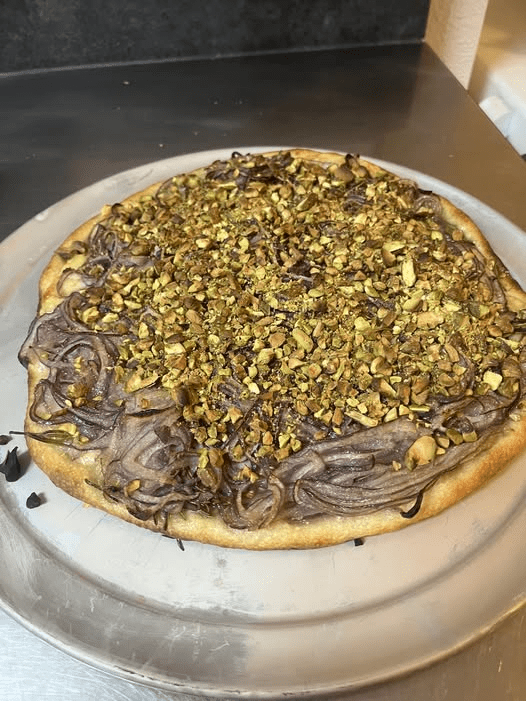
What encouraged us to make this pizza is that the ingredients, as described by chef Blanco, “create alchemy!” The Rosa Pizza inspired by Chris Blanco, the founder of Pizzeria Blanco in Arizona, is without a doubt, rated one of the best pizza restaurants in the United States. Chris said, “garbage in, garbage out,” and watching his commitment as he searched for and found excellent local ingredients, especially the hand made stone ground flours inspired me. His quest for the perfect pizza crust steered me in the direction of Hayden Flour Mills. With all that in mind, and feeling inspired, we set out to make the Rosa Pizza. What makes this pizza so yummy is that it is actually a very simple pie. It has Parmesan, Thinly sliced red onions, fresh rosemary, and it is finished with chopped pistachio nuts that are introduced part way through the cook. It is a stunning pizza and I am sure we will make it again and again. As Chris Blanco says,”Alchemy!”

Ingredients:

  • Fresh sliced Parmesan
  • Thinly sliced red onions,
  • Fresh rosemary
  • Pistachio nuts broken with mortar and pistil
  • Finished with olive oil

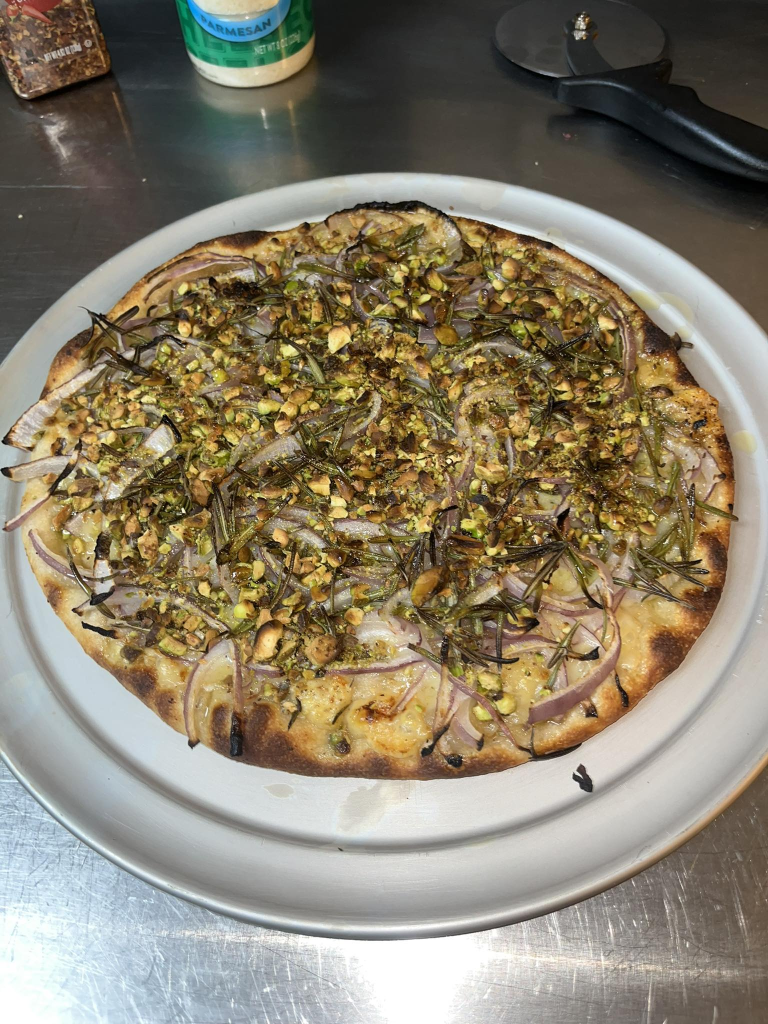
Our second version of the Rosa, from Chris Bianco’s restaurant in Phoenix, was a big improvement on the first. Better dough, better bake, better understanding of ingredients and so on As Chris puts it, this pizza is alchemy. Red onions and rosemary on parmesan, with a roasted garlic olive oil base (my addition) and then finished with pistachio nuts added with about 2 minutes of the cook to go. It is a beautiful bite of food. The fragrance of the rosemary, the sweetness of the onions, the crunch of the pistachio nuts and the bite of the dough is just yummy! It hits all the notes and as we clean our plates we say something to the effect of, “I really enjoyed that!”

Easier to see the ingredients before the bake.

this one was pretty good. Garlic infused olive oil, marinated onions, fresh rosemary, crushed pistachio

I use dway more onions this time and it was lovely

Clam Pizza

This is our Clam Pizza cooking in the oven. (I promise to take a better picture next time we make it!) It’s a wonderful pie conceived by Seattle chef, Tom Douglas and is served at his restaurant Serious Pie. I love this pizza and it was the first pizza I ever made. The first time I made it, I bribed a local pizza place to let me have some uncooked dough. It was much harder to get than I anticipated. But, it worked and we made a pie! Since then it has remained one of my very favorites, It’s a no sauce pizza that rests on garlic infused olive oil as the base. It has Manila clams, pancetta, chili flakes and lemon-thyme and Parmesan finished with some finishing oil. It is a really surprising pie. Intense flavors that send you back for another bite. Definitely moreish!

Ingredients:

  • Whole and chopped Manilla Clams
  • Crisp Pancetta
  • Chili flakes
  • Lemon Thyme
  • Fresh Parmesan
  • Chopped garlic
  • Garlic infused Olive oil

How I make the garlic infused olive oil is that I place a whole pealed cloves in a cup of olive oil and bring it up in temperature. As the garlic browns, I make sure that it does not burn or the sauce will be bitter. I remove the garlic when it’s cooked and allow the oil to cool before I bottle it.

Dutch Baby

the Dutch Baby is one of my go to Sunday breakfast treats. I have spent years perfecting it! LOL It’s so easy to make that even a novice can turn out a world class Dutch Baby.

Ingredients:

  • 3 eggs
  • Half a cup of milk (I use 2%)
  • Half a cup of all purpose flour
  • 1 Tbs of sugar
  • A generous pinch of ground nutmeg

The way I make it is that I drop the ingredients into a mixing bowl, then using a hand mixer, make sure its all mixed in. Let it rest, in total for about a half hour, while the oven, which you are pre-heating to 425 degrees is getting hot. Make sure to put a clean large frying pan in the oven so it gets hot as the oven gains temperature. Apparently, resting the custard allows the glutens to bind. Anyway, when the oven comes to temperature, add a half stick of butter to the frying pan.

While the butter is melting (which does not take long at that temperature), give the custard another mix with the hand blender, then (using a serious oven mitt) put the frying pain on top of the stove and pour all the custard into the pan, then, again, using a serious oven mitt, put it back in, close the door, and wait a minute till the oven heats up again after having the door open.

What I do next is change the temperature to 400 degrees and once it hits 400 degrees, I set the timer for 20 minutes.

Now here is where you need to know your oven, we just got a new oven, and it’s way more efficient than the last one, so I check it at 17 minutes. This one came out at 18 minutes.

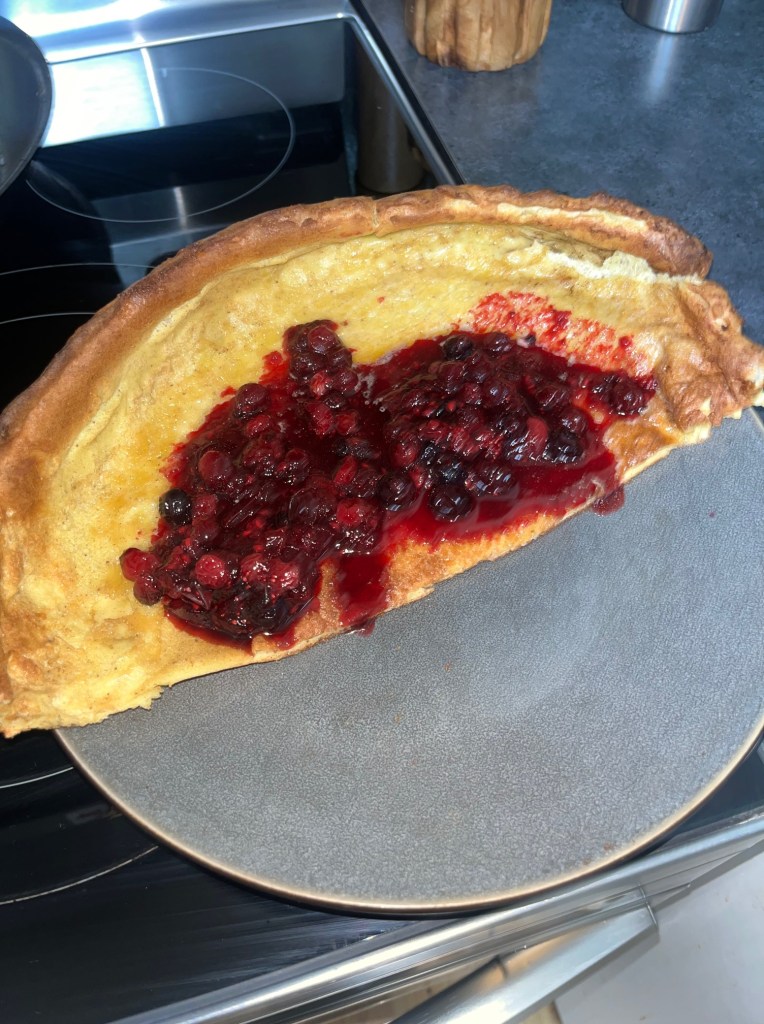
The way we eat this is that we split it down the middle, and today, Heather made a lovely, tangy, tasty berry compote to go with it.

Enjoy!

Spaghetti and Meatballs

When I make spaghetti and meatballs, I always make the marinara first, then the meatballs, and both are from The Frankies Spuntino Kitchen Companion & Cooking Manual, When you read the “About These Recipes & This Cooking” section,” it begins with “The recipes contained herein are a more-or-less the core catalog of the dishes that have been served at the Spuntino since it opened in 2004 (and its Manhattan sibling which opened in 2006.) If I ever get to the East Coast again, I will definitely eat there!

To make the spaghetti and meatballs, I set the meatballs in a marinara sauna and let them simmer there for about 30 minutes. While that is occurring I make the spaghetti, making sure it’s al dente, I dish the now warmed meatballs on the plate, and finish the spaghetti in the sauce before dishing it on the plate next to the meatballs, then I cover everything is sauce, add more pecorino romano on top, a slice of garlic toast and we are off to the races! A truly delicious plate of food!

Meatballs!

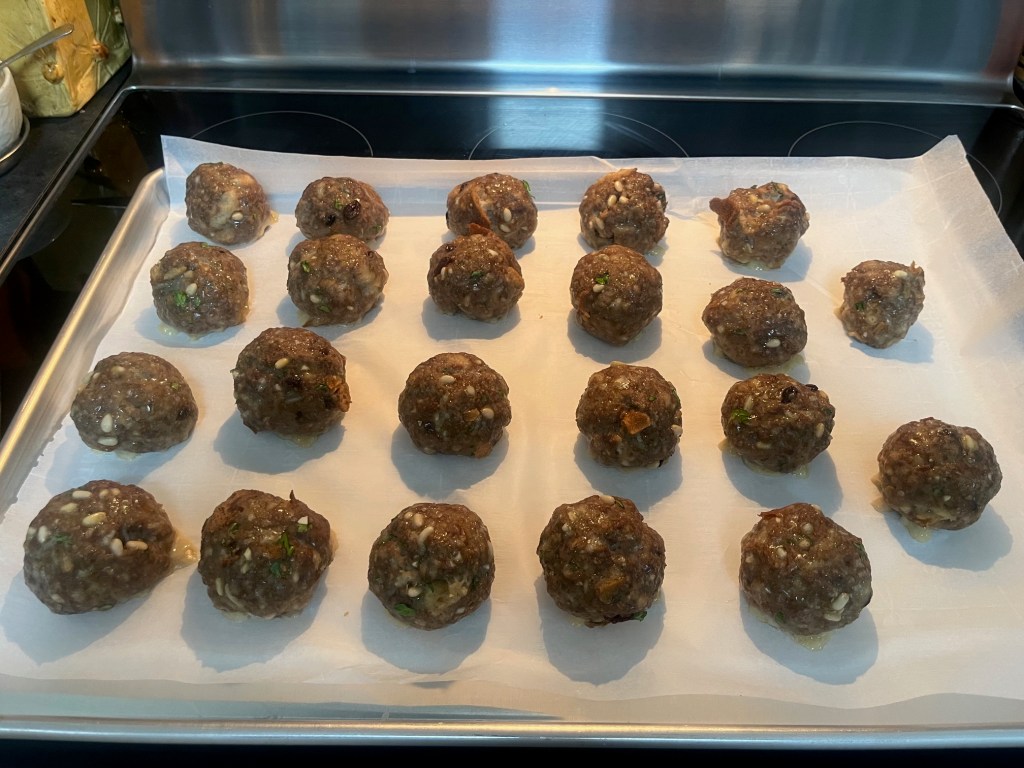
When I want to make meatballs, once again, I turn to Frankie’s Spuntino amazing Italian recipe book. Their meatballs are the bomb. I use The Spuntino Way to make mine.

Ingredients:

  • 4 slices of bread
  • 2 pounds of ground beef
  • 3 cloves of garlic, minced
  • 1/4 cup fresh chopped flat leaf Italian Parsley
  • 1/4 cup raisins
  • 1/4 cup pine nuts
  • 1 1/2 tea spoons of fine sea salt
  • 15 turns of white pepper (about a half a teaspoon)
  • 4 large eggs
  • 1/2 cup fried bread crumbs

Preheat the oven to 325. Soak the bread in water for a minute, then pour the water off and wring out the bread, tearing it into tiny pieces.

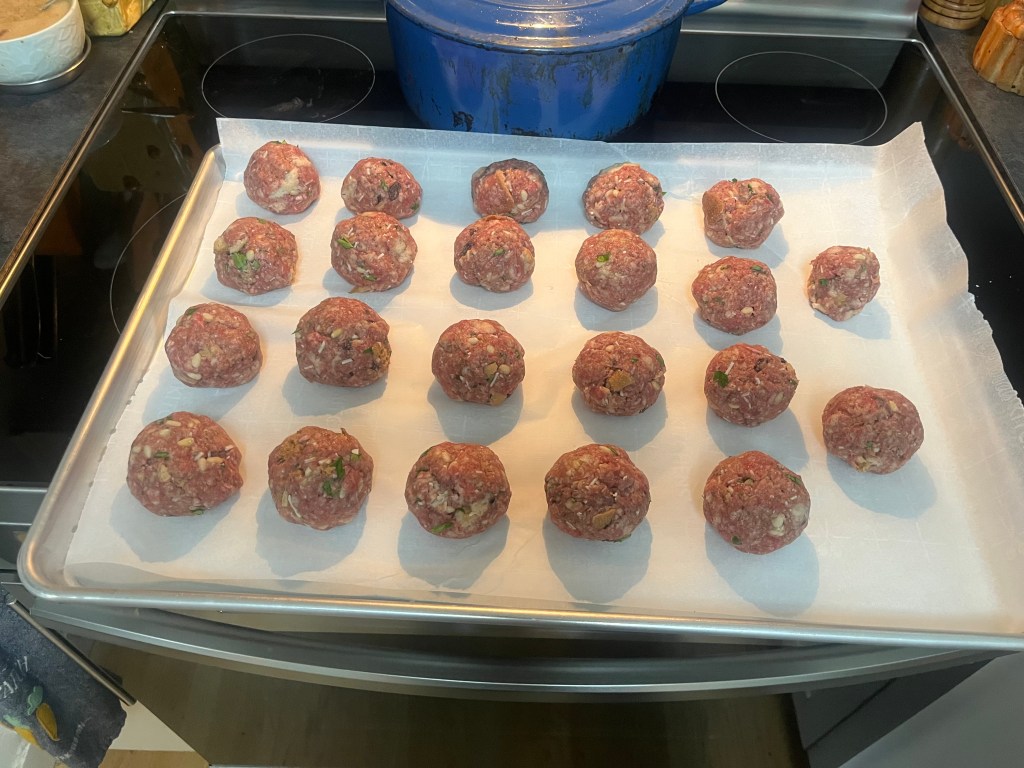
Combine the bread and all the ingredients, making sure to add the bread crumbs last to adjust for wetness. Also, add the ingredients in order as listed. After mixing it, shape the mixture into handball size balls and arrange them on a lined cookie sheet with plenty of room. Bake for 25 to 30 minutes. The meatballs will be firm but juicy and gently yielding when pressed.

At this point you can cool them and hold them in the fridge or freezer, or you can drop them into the tomato sauce and saute them for about 30 minutes before serving. (Not more than that or they will dry out.)

I always eat the left over little one as a taste test, and Oh My! They are delicious!

Marinara Sauce

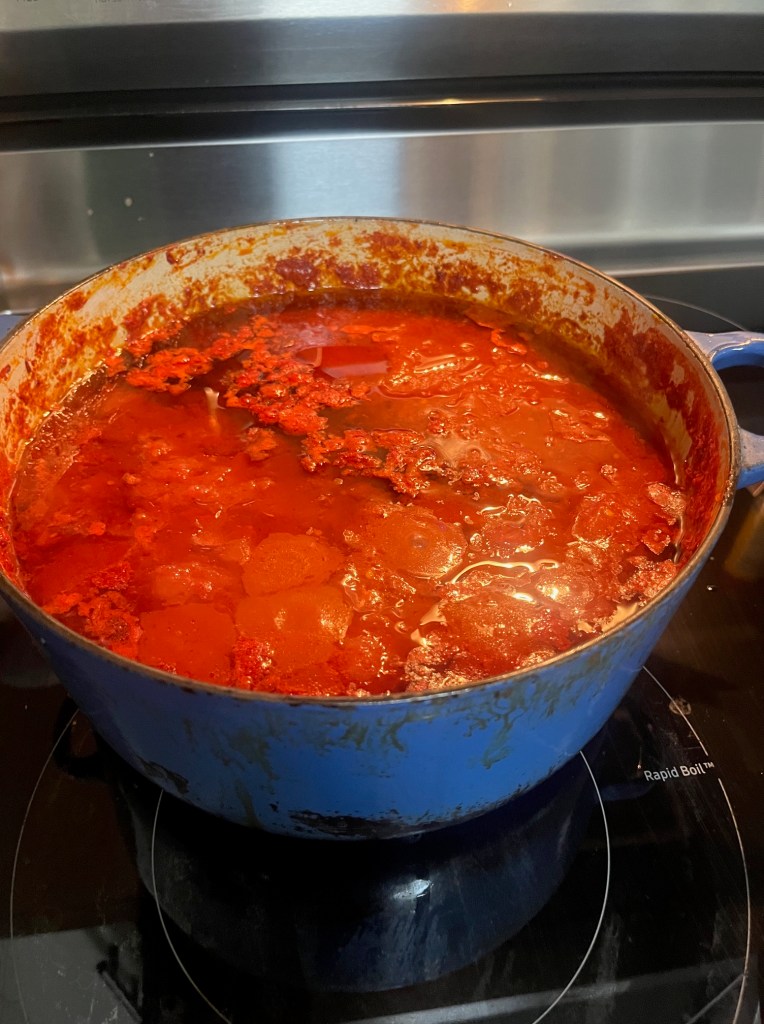
I have found that it’s really easy to make delicious authentic marinara, or what some Italian americans call “gravy”. I found a recipe in Frankies Spuntino Kitchen Companion & Cooking Manual. It’s a great recipe book for Italian cuisine by the way.

This is the tomato sauce they make in their restaurant and it is both brilliantly simple and very versatile. We use it for spaghetti and meatballs, eggplant parm, pizza and more.

Ingredients:

  • 1 cup olive oil (use a good one)
  • a whole peeled garlic, (13 whole cloves)
  • 1 96 oz can of Italian tomatoes (or 4 28 oz cans)
  • A large pinch of pepper flakes
  • 2 teaspoons of Sea Salt (have more on hand for taste)

It’s a 4 step process.

  1. Combine the olive oil and the garlic in a big sauce pot over medium -low heat till the garlic develops brown streaks. It’s important NOT to burn the garlic or your sauce will be bitter. Keep an eye on this and reduce the heat it you think the garlic is going too dark too fast.
  2. As the garlic is cooking, deal with the tomatoes. Pour them all into a large bowl and remove the stems from each tomato, then crush them with your hands. Discard the stems and any basil leaves that are present.
  3. When the garlic is just about done, add the red pepper flakes and let them roast for no more than a minute so that their flavor infuses into the garlic. Then add the tomatoes, and the salt. Give it a good stir, then turn the heat up so that it comes to a gentle simmer. Allow it to simmer for 4 hours, mothering it a little bit.
  4. Check the sauce for salt at the end. You can use the sauce for meat at that point and it can store in the fridge for up to 4 days. You can also freeze it for a few months if needed.

Sausage Rolls

Growing up in South Africa, sausage rolls were one of my favorite snacks. I love meat pies generally, and I also have made Cornish Pasties, Steak and Mushroom Pies, Curry Beef and Curry Chicken pies and more. But, Sausage Rolls are a favorite.

Ingredients:

  • Medium Brown Onion
  • I lb of regular sausagte
  • 1 lb of spicy sausage
  • Regular bread crumbs
  • 2 eggs
  • Sea salt
  • Pepper
  • Cumin
  • Peri-Peri
  • Puff Pastry

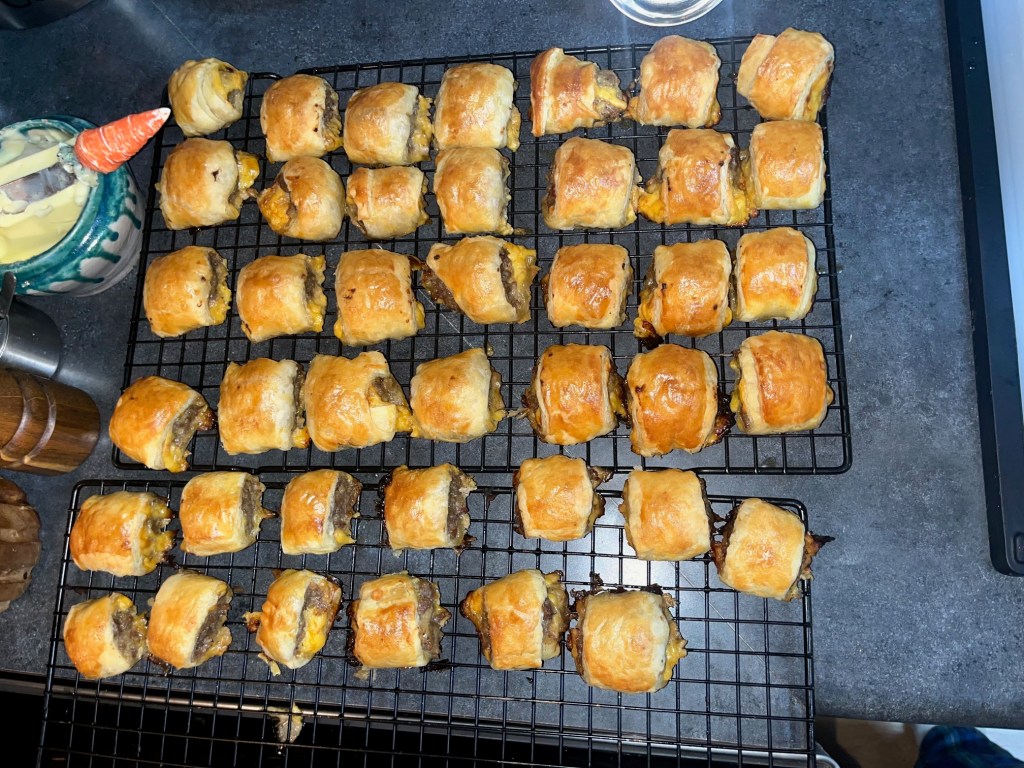
I like them peppery and spicy. The way I make them is I first caramelize chop the onion. When it cools, I add them in a large mixing bowl to the sausage, and I break one egg into the mixture. I mix it well, assessing the moisture, then I add breadcrumbs, usually about a cup, which helps absorb the moisture. When the mixture feels about right, I add a teaspoon of cumin, a table spoon or two of black pepper, a teaspoon of sea salt and a table spoon of peri peri. I mix it up well to distribute the spices evenly and let it sit, covered in the fridge for a few hours or as long as overnight.

First I preheat the oven to 350.

Then I lightly flour a rolling surface, and roll out the puff pastry. I spoon a long strip of sausage along one side and roll it over so its covered. Then I massage it to get the spread even. I cut off the stop from the rest of the dough, then cut the rolls into bite sizes and place them on a lined cookie sheet. I repeat until the dough is used up. Once all the sausage rolls are on the cookie sheet, I take the second egg, beat it with a little water to make an egg wash. I make sure all the rolls are painted with the egg wash and into the oven it goes. At 30 minutes I check the doneness, and either add more time at the same temperature or, if I want them darker, increase the temp to 400 for the next few minutes. I watch them closely to make sure they don’t burn. I put them on a wire rack to cool. Then when I serve them, I serve them with brown sauce (HP Sauce)

Slow Roasted BBQ Ribs

I LOVE slow cooked BBQ Ribs, but I do not have a smoker. A few years ago, I watched an episode of Restaurant Impossible with Robert Irvine, and he showed the restaurateur a brilliant technique to turn out fall off the bone ribs in his kitchen. I have used that technique since then, and it works brilliantly.

It’s pretty easy too. I prefer baby back pork ribs. FIrst, you slice the ribs into serving sizes, we do 4-6 bones per serving, depending on the size of the ribs. Then you create a dry rub. I tend to use salt, pepper, and chili powder. More spices does not make it any better. Cover the whole slab, both sides with the dry rub.

Wrap them individually in cellophane. Make sure they are properly wrapped. Next, wrap them in tinfoil. Make sure the seal is on top. Place them in an oven that is preheated to 170-200 F. It’s a good idea to put a cookie sheet on the shelf under the ribs so drips can be captured. Leave them in the oven to slow cook for 7 – 9 hours.

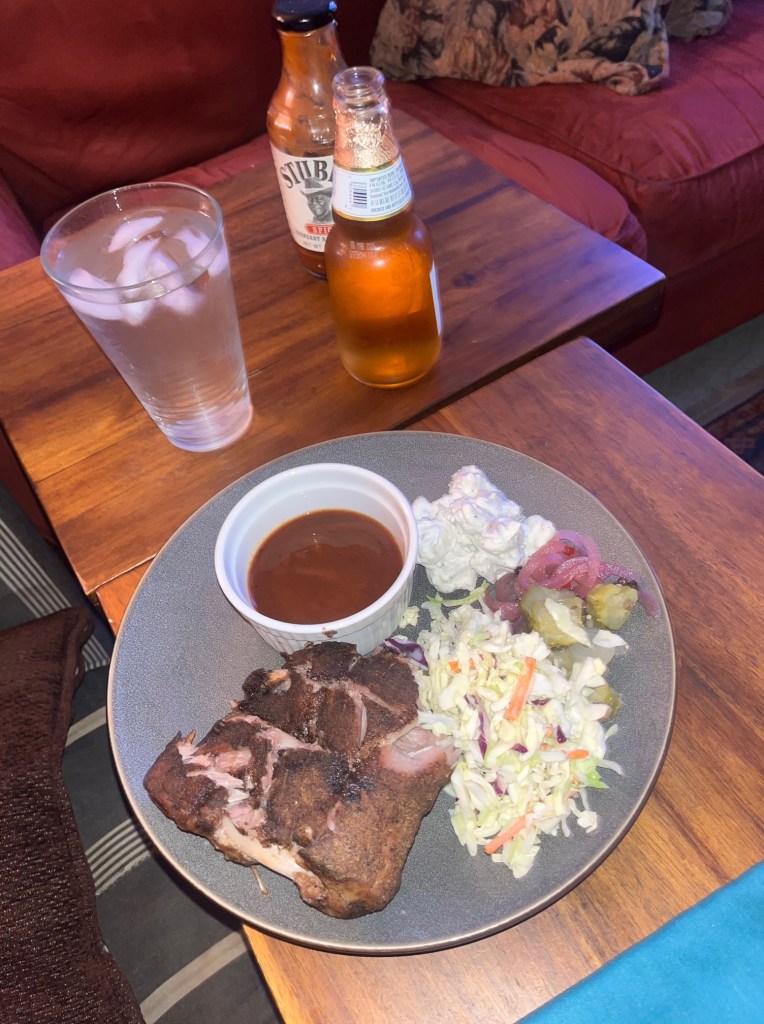
When I take them out, I will either paint them with BBQ sauce and broil them to get some caramelization, or I will serve them as is with BBQ sauce on the side.

I like to make pickled onions or shallots to go with them too. We also make (or buy) coleslaw and potato salad as sides.

To make the pickled onion, I do a quick pickle with red wine vinegar, some black pepper corns and some sugar. Bring it to a boil, then take it off the heat and let the onions cool. Drain them before serving.